Currently there are only a few ways to secure roofing felt to a dry in a house or otherwise complete a new shingle project. Thanks to Fasco, there is now one more. We personally discovered Fasco’s Windstrips products at the 2009 International Builders Show in Las Vegas. Windstrips were developed to allow contractors to quickly and easily install felt underlayment while simultaneously providing an advanced level of wind protection. When used with 30lb felt paper, a standard 1-1/8″ wide, 350′ roll will protect approximately 800 sq. ft. of roof area. What Fasco didn’t have at that event was their new SideWinder Windstrips Installation Stapler. This tool is still under development by Fasco, but Pro Tool Reviews got our hands on one to use on a local roofing project.
Yeah, we were excited too.
Before the SideWinder, Windstrips needed to be installed with a standard hammer tacker/stapler or Pneumatic rapid fire staple gun, using 3/8″ crown, 3/8″ long (or better) galvanized staples. Since the staples had to be no more than 9″ apart, and centered on the strip, Windstrips offered excellent protection, but it took a lot of technique to get it right and become truly accurate.
Windstrips vs. Round Cap Roofing Nails
The principle with any underlayment fastening system is to secure the felt against wind. While most roofers will tell you that once the shingles are down this is hardly an issue, inspectors and code say otherwise. Plus, Fasco has some compelling video that shows some roofs with the shingles all being blown off due to an F3 tornado – and yet their Windstrips are holding the roofing felt more or less secure. It’s impressive, but let’s get back to the details.
Round cap roofing nails need to be installed, in most high-wind areas at least, such that they are dense enough to prevent wind from lifting up the roofing felt and taking it off the roof or ripping it away from the cap and nail. The result is a pincushion pattern of installation which takes a lot of time – even with a pneumatic button cap stapler. Windstrips work on the principle that if you seal all the edges, wind can’t get any lift to pull the roofing felt off of the roof. It’s a sound principle and allows the roofing felt to be tacked into place and then sealed on three sides with the Sidewinder tool (or manually with a hammer tacker).
Build Quality
The Sidewinder we used was most definitely a prototype (one of six in the country), though we don’t expect its industrial design to be altered too much in the final shipping version. The tool features a F1B-style fully-automatic pneumatic stapler with an extended, double-length magazine that was configured for use with the provided 3/8″ staples. The tool is a marine blue with nice rubber overmold around the handle to make it no-slip and comfortable to use. Compared to other pneumatic tools, like framing, roofing coil, and even finishing nailers, the base tool is very lightweight. The addition of a few pieces of powdercoated metal allow for mounting of the Windstrips roll along the side of the tool and a guide to allow it to feed through to the stapler. The long, narrow nose gives a good view to the exact area being stapled so you have a pretty clear line-of-sight while using the tool. The magazine is bottom-loading, so loading staples can be accomplished more or less one-handed, though the mechanism is a bit feisty at times. The trigger is thin and easily depressed. At times there was a delay between semi-automatic and fully-automatic modes, though we’re not sure why. Exhaust blows out the rear and the tool is very quiet for a pneumatic gun.
How the Windstrips Product Works
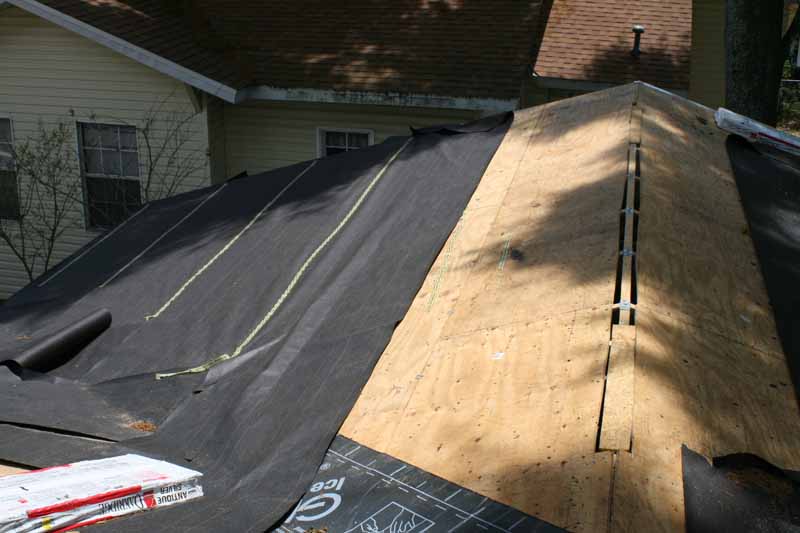
As we mentioned, with respect to underlayment, Windstrips need to be installed everywhere there is an exposed edge of tar paper. This includes all eaves, ridges, rakes, hips, valleys, and horizontal field seams. Having a tool that automatically spaced the staples and provided an automated way to center and drive the fasteners into the Windstrips would be an incredibly useful tool to speed up this method of installation. That’s whay makes the SideWinder so handy, especially for those committed to using Windstrips.

For the primary run, at the bottom edge of the felt, the Windstrips need to be set within the bottom 2″ of a standard (36″ wide) sheet of felt, preferably 30-lb to avoid nixing the warranty. The staples need to be centered in the Windstrip so that both legs penetrate both the plastic strip and both layers of felt at any seam. The SideWinder of course, takes care of the whole issue of alignment. You also want to stop the Windstrip short of any sidewall so as to not allow water to side wash under your flashing.
The trick with Windstrips is that you first need to prep the felt to both meet code (where applicable*) and hold it in place. This means laying out the felt and stapling it thoroughly in the field in a “W” pattern, with 5 staples per vertical row and the tops or bottoms of the “W” no more than 24″ apart. After this you are ready to install the Windstrips. To start, you pick a seam and set a couple of staples in the end, making sure it secures the beginning of that roll to the roof and readies the SideWinder to begin. Next you simple walk forward, either pulling the trigger to secure a staple every 9-inches or by setting the repeat fire frequency and holding in the trigger. This staples the Windstrips down as you go and the SideWinder keeps the pneumatic stapler perfectly centered over the Windstrips roll. Fasco has added a tensioning system to ensure that the Windstrips are kept tight as the rool unwinds.
When you come to the end of a row you can fire a few staples in the end and then pull back and to the left (our favorite method) to tear the Windstrip and ready the tool for use on another seam.
Regarding Code: Windstrips are not yet approved for use in Florida. Fasco America, whose Windstrips have been written into the Fort Collins, CO code as an accepted product, applied for Metro Dade Approval but they responded that staples are illegal to use. The current perceived standard is Metro Dade, largely due to the media coverage surrounding the extreme damage from Hurricane Andrew. However, when Fasco was first looking for a wind tunnel test facility, they were made aware that Boulder and the Front Range of Colorado have 3 times as many high wind occurrences than the entire State of Florida per year. Additionally, most codes state that tar paper needs to be held in place well enough so as to be intact when the shingles are installed, but they rarely specify how. Despite the issue with Florida code (Editor: which we imagine largely has more to do with money than safety), Windstrips meets that common sense requirement exceptionally well.
Recommendations
While Windstrips (and especially the Sidewinder installation tool) are pitched to increase productivity by allowing faster dry-ins, we actually feel that they are more appropriately categorized as an advanced protection device. Since you must first prep the underlayment with a ‘W’ pattern (using staples) prior to using WindStrips, the use of a button cap stapler is just as fast, in our experience. The impressive video comparisons featured on the Windstrips website fails to take this into account – something we feel is a major oversight. Since the button cap method is accepted by virtually all known municipalities, and Windstrips is still working its way through the system, it may be a while before you can try this method on your own roofing projects. We do feel, however, that Windstrips offer an excellent level of protection over button caps by giving the wind nowhere to ‘get any lift’ since the technology seals all exposed edges of the underlayment. Windstrips can be shingled over easily with any approved material and it is great to see this type of clear and original thinking with respect to the advancement of roofing technologies. Competition is a good thing and we hope that Fasco and Windstrips receive approval in more counties and states soon.