
I was well into my second trimester and already hitting the “nesting” phase of pregnancy. I had an overwhelming urge to get my house in order before the baby arrived, and I had a handful of projects to knock out before then. Let’s call this DIY loft bed with desk project “Nesting with Power Tools”.
First up, I needed to get the playroom organized for my other two kids. Because, if I have an organized playroom, surely my children will be able to clean their own rooms and do their homework unassisted and my life will be amazing and wonderful…right?
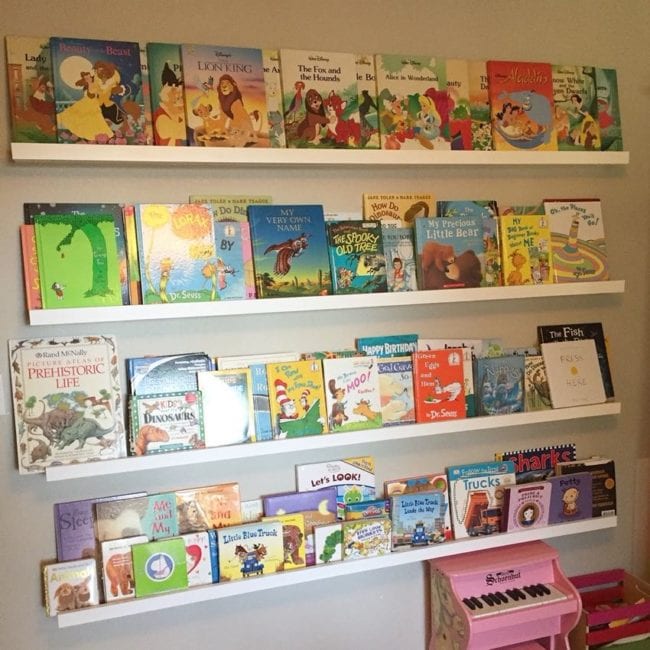
I had plotted for a few months now to redo their playroom. My first project was floor-to-ceiling bookshelves. There, I keep all of the more cherished “please don’t rip the pages out” books up on the top shelves. The sturdier everyday books can live on the bottom shelves within reach. For this, I used Ana White’s simple DIY plan for “Ten Dollar Ledges” that you can find here.
Adding a Desk Underneath a Loft Bed
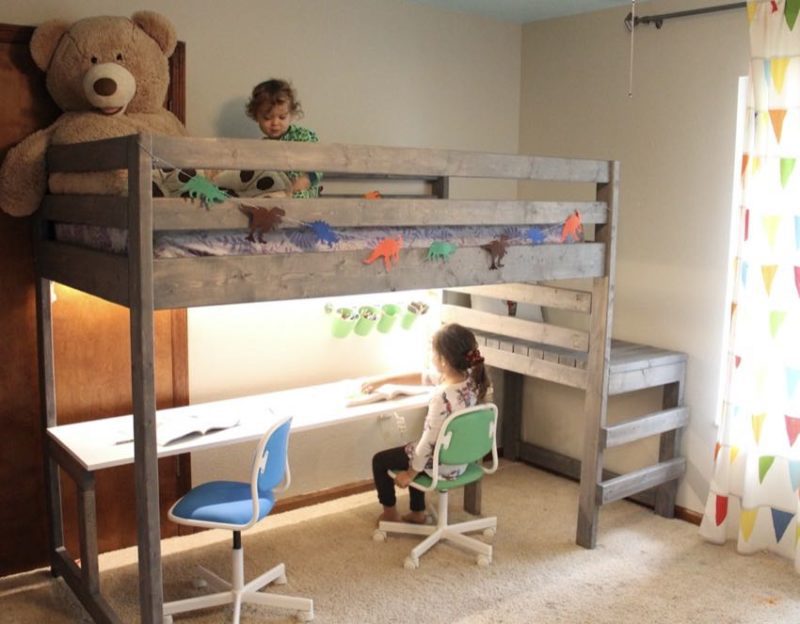
This DIY loft bed with desk would make the room more functional by giving my kindergartener a large workspace to do her homework. It would also serve as a comfy place to read. Plus, it frees up additional floor space for train tracks and puzzles.
My solution: a two-in-one reading loft above and workspace underneath. It would leave plenty of floor space for free play. This project works perfectly for a child’s bedroom as the loft portion fits a twin mattress perfectly.
My design modifies this plan to fully accommodate my vision.
Supplies & Tools List
- Tape measure
- Speed square
- Pencil
- Kreg Jig
- Drill
- Drill bit set
- Circular saw or miter saw
- Sander
- Pneumatic or cordless finish nail gun
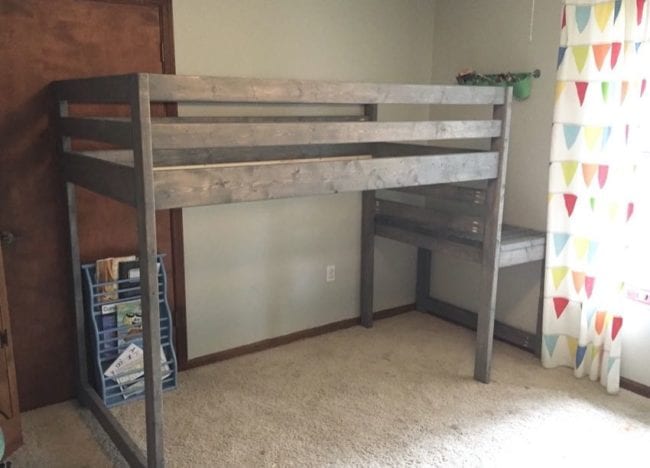
In the link above, Ana White has already created a perfectly wonderful DIY for the loft bed. You can use her tutorial to complete the first few steps. After Step 6 we depart once we’ve placed the decking on the top of the stair platform.
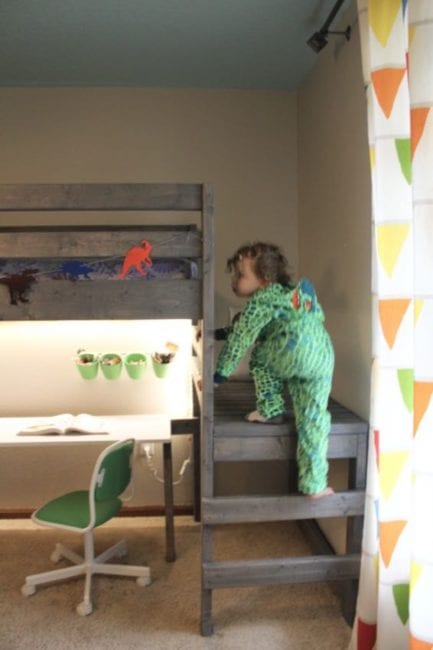
You could also complete her build all the way through Step 9 if you wanted to build the staircase. I opted instead to attach two 2×4 rungs up to the deck to save floor space.
Helpful Tip and DIY Loft Bed Modifications
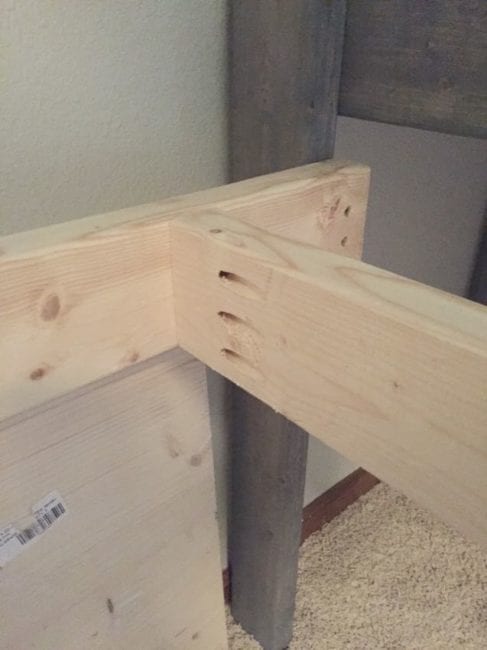
- My husband suggested using 5” lag screws to attach the side rail 1x6s for added support. Pocket holes are probably sufficient, but I’d rather overdo it and rest easy knowing the supports for the bed aren’t going to fail.
- Do all of your finishing work outside to avoid getting sawdust all over your house.
- Remember to assemble the pieces that you’re using wood glue on first, BEFORE staining, as wood glue will not adhere properly to stain.
- For a more finished appearance, use Kreg plugs (or wood filler) to fill in all the pocket holes after you’ve assembled the bed, then touch up the paint/stain.
- Remember to set the correct depth on your Kreg Jig before making those pocket holes. The actual width of a 2×4 is 1.5”, so adjust your Kreg Jig accordingly.
The finished loft built to Step 6 looks like this:
Adding a Workspace Underneath the Loft Bed
Shopping List for the Under-Loft Desk
- 2 – 2x4s
- Spruce project board OR 3/4” plywood cut to 72” x 20”
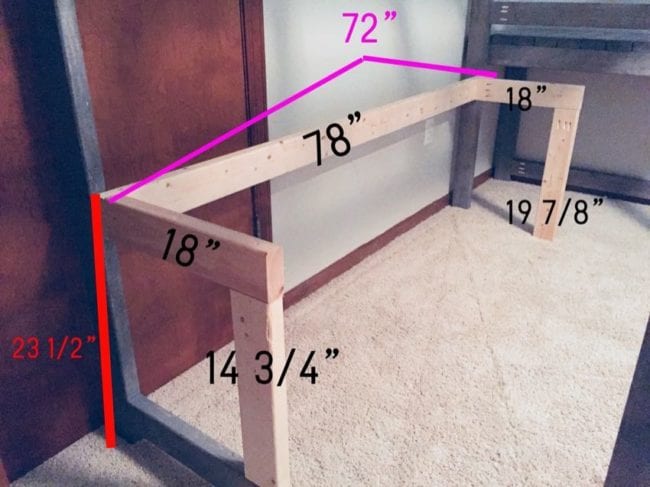
2×4 Cut List
- 1) 78″
- 2) 18″
- 1) 19-7/8″ **Read below + cut as you go
- 1) 14-3/4″ **Read below + cut as you go
First, build out the frame to hold the floating desk. To do that, decide how high you’ll want the desktop to be. A “standard” child desk height sits around 24-1/4” high (regular desk height for an adult is 29″). If you have a younger or older child you can go higher or lower. 24-1/4″ seemed a good height for a 1st-3rd grader and it gives them a little room to grow. If you want to go with this desktop height, measure from the floor up and make a mark at 23-1/2” where the desk attaches.
Attaching the Desk Frame to the Loft Bed
Use 2.5” screws to attach your 78” 2×4 to the bed, then check for level. We don’t want pencils rolling off the desk! After you’re sure the 78” 2×4 is level, go ahead and attach the ~18” horizontal 2x4s with pocket holes. Since the desktop will be 72” wide, measure 72” from the outside of your left horizontal support and make a mark, which is where the outside edge of your right horizontal support will need to be.
Use a tape measure to check the length from the bottom of your horizontal supports to the floor before cutting the upright supports for the desk. If you’ve had to adjust your board at all to make it level, you may find the cuts for your leg supports need to be a little different from the measurements above.
Next, attach the leg pieces with more pocket holes.
Attaching the Desktop
I had planned on using 3/4” plywood cut to size for the desk, but instead, my husband found a spruce project board for under $30 that was almost exactly the dimensions I’d wanted. You can do that or get 3/4″ sanded plywood cut down to 72″ x 20″.
After painting the desktop, I attached it to the supports using a pneumatic nailer.
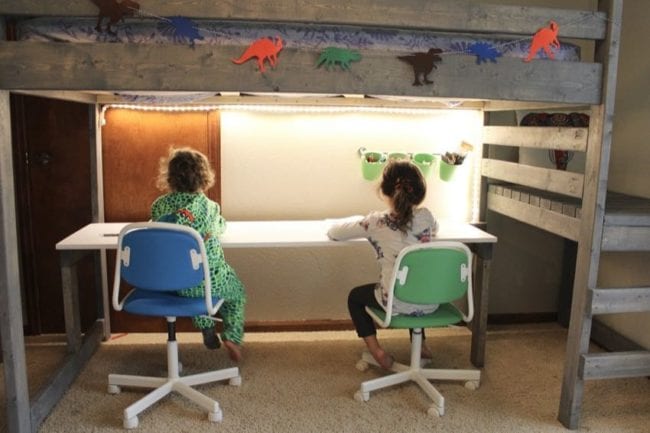
Voila! You made a DIY Loft bed with desk! I added a lighting strip above the desk, but you can finish up the project however you’d like. I even found adjustable-height children’s desk chairs at IKEA for $35 each.
Thanks for following along with my latest project! Let me know what you think. Happy building!


What type of lighting strip did you use? I just built a under-loft desk for my son and a desktop lamp isn’t quite cutting it.