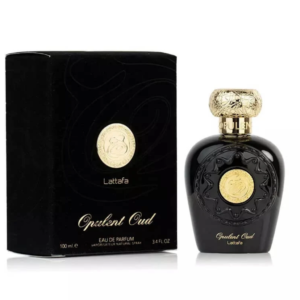
Hardware & Fastener Reviews & Buying Guides - Pro Tool Reviews https://www.protoolreviews.com/category/tools/hardware-fasteners/ Professional Tool Reviews for Pros Thu, 27 Oct 2022 19:35:51 +0000 en-US hourly 1 https://wordpress.org/?v=6.1.1 https://www.protoolreviews.com/wp-content/uploads/2014/10/cropped-PTR-favicon-32x32.png Hardware & Fastener Reviews & Buying Guides - Pro Tool Reviews https://www.protoolreviews.com/category/tools/hardware-fasteners/ 32 32 Best Deck Screws for Pressure Treated and Composite Wood https://www.protoolreviews.com/best-deck-screws/ https://www.protoolreviews.com/best-deck-screws/#comments Fri, 29 Jul 2022 17:00:00 +0000 /ptr/faqs/hardware/best-deck-screws CAMO Marksman Pro X1 Hidden Deck Fastening System - screwsDeck screws are available in a wide variety of styles, finishes, threads, and drive types. Be sure to first match […]

The post Best Deck Screws for Pressure Treated and Composite Wood appeared first on Pro Tool Reviews.

]]>

Deck screws are available in a wide variety of styles, finishes, threads, and drive types. Be sure to first match the types of materials you are fastening. The best deck screws for composite decking may not be the same ones you use on pressure-treated wood decks.

Editor’s Note: Check out our recommendation on how to organize screws and nails using the Milwaukee Packout system.

Types of Materials and Coatings Used in Deck Screws

You can find many types of deck screws specifically designed to work best with either pressure-treated lumber or composite decking. The type of material used to make and/or coat the fastener really does matter. For example, stainless steel deck screws (which often have a square drive) can be softer than other screws, but they provide exceptional protection against corrosion.

Other screws feature coatings to give them protection against corrosion. For example, certain Grip-Rite decking screws feature a PrimeGuard Plus coating with a lifetime guarantee against rust and corrosion. Deckmate screws use a similar lifetime polymer coating. Everbilt screws also provide a bonded material specifically geared towards use in pressure-treated lumber.

stainless steel deck screws
stainless steel deck screws (square)
Grip-Rite coated deck screws
Grip-Rite coated deck screws (T-25 star)
Everbilt coated deck screws for PT
Everbilt coated deck screws (T-25 star)

GrabberGard screws claim an encapsulated substrate which they bond with the surface coating using a thermal fusion process. No matter what type of exterior screw you use, ensure it includes a coating to protect it from the elements…unless you go with stainless steel. The worse the environment (think of a raised oceanfront beach home as your extreme), the more you want to focus on the deck screw material.

The Best Decking Screw Drive Type

When it comes to the type of drive you want in your decking screws, we can all agree on one thing: Philips and “Bugle” heads are out! We highly recommend the use of either square drive or Torx (or the similar “star drive”). Square (Roberts) drive provides a more positive bit engagement over Philips. This makes it easier to drive and harder for impact driver bits to strip the heads of stainless steel decking screws.

For coated screws, we typically prefer Torx or star drive (T-25) as it gives you lots of points of contact. This results in a very confident start, and the bit stays in the fastener throughout the drive.

Many coated deck screws still use a Philips head or a variation of a Philips-type drive. Other than perhaps cost, we see no reason to choose these over T-25 star drive.

Editor’s Note: The biggest reason screw heads get stripped out is because the bits are worn. Using a cordless impact driver also helps to drive screws without stripping the heads. Many times manufacturers use different types of bits to help set their product apart from other similar products. For us, it has more to do with speeding up our workflow. Compared to other drive types, Philips slows you down.

Decking Screw Thread Designs

In the past, threads were threads. Now, manufacturers of decking screws have really studied and perfected their products. We see several different types of threads that help when installing various fasteners into pressure-treated or composite deck boards.

Standard Threads

standard screw threads
standard screw threads – nothing to see here.

No surprises here. You can certainly find coated deck screws that offer standard threads with no frills. You may even save some money buying these fasteners as they don’t include proprietary or patented technologies.

Self-Starting Cut Point

self-starting cut point
Self-starting cut points reduce splitting

Screws with a self-starting (Type 17) cut point resist splitting. This plays very well when screwing into pressure-treated deck boards. The last thing you want are split ends to introduce water into your 5/4 decking.

Dual-Threaded Design

dual-thread design
Dual-thread design

Some of the best deck screws include a dual-thread design. This lets the screw use a lower torque for the initial drive and then follow up with a tighter thread to pull the top board tight to the joist.

You can also see on the head of this decking screw that they added a ribbed feature to help countersink the head into the board when fully driven. Many coated deck screws feature a design similar to this and we’ve found it very helpful.

Reverse Threads Reduce Mushrooming

reverse threads mushrooming
Reverse threads reduce mushrooming

One common problem when screwing down composite decking is mushrooming. The area around the screw pops up and creates a raised area. Adding a reverse thread near the top of these screws helps remove that raised mushroom. Manufacturers also typically pair this with a concave face that pushes material down to get a nice flush finish.

Our Top Picks

We figured that after giving you all the ins and outs of the tech and coatings we should probably pick some screws that we use regularly. Following are our top picks along with brief descriptions for why we prefer them to other brands and types.

Best Deck Screw for Pressure-Treated Wood

Everbilt Exterior Wood Screws

Everbilt exterior wood screws

When dealing with pressure-treated deck boards, the tip and course threads on these screws prevents splitting. The T-25 star drive makes for quick drives, and the coating ensures these screws hold up over time.

Best Deck Screw for Composite Boards

Grip-Rite Star-Drive Deck Screws

Grip-Rite Star-Drive Deck Screws

Available in brown, tan, and gray, Grip-Rite Star-Drive Deck Screws present a few of the features we like. You get the easy-drive coarse threads that start and drive smoothly and quickly. You also have a tight reverse thread that works well with the small pan-head to eliminate mushrooming.

The star drive resists stripping and you can find these screws in 2-1/2″ or 3″ lengths. We used these screws on a composite decking project and loved the way they looked. The finished project looked fantastic and we loved how flush you can get these screw heads with very little showing.

Best Stainless Steel Deck Screws

Deckmate Square Drive Stainless Steel Deck Screws

Deckmate Square Drive Stainless Steel Deck Screws

I really like Deckmate Square Drive Stainless Steel Deck Screws for their quality and variety of options. Unlike some other stainless screws we’ve used in the past, these aren’t so soft that the heads strip out easily. Rather, they drive quickly, due to the course threads and resist splitting.

Deckmate doesn’t do anything fancy with the head, but we found it sinks quickly and easily when driving into pressure-treated wood. Made of 305 stainless steel, you want to use these screws when dealing with harsh environments—including building near the coast.

Why You Can Trust Pro Tool Reviews

Ever check out a “review” site and you can’t tell if they actually tested the tools or if they’re just “recommending” the Amazon top sellers?

That’s not us. We only recommend what we’d actually use, even if we don’t earn a commission from it. It’s all about giving you a legitimate recommendation and our honest opinion of each product.

We’ve been in business since 2008 covering tools, writing reviews, and reporting on industry news in the construction, automotive, and lawn care industries. Our Pro reviewers work in the trades and have the skills and experience to know whether tools can perform well in the field.

Each year, we bring in and review more than 250 individual products. Our team will put our hands on hundreds of additional tools at media events and trade shows throughout the year.

We consult with innovators in the technology and design of tools to gain a broader grasp of where these products fit and how they work.

The post Best Deck Screws for Pressure Treated and Composite Wood appeared first on Pro Tool Reviews.

]]>
https://www.protoolreviews.com/best-deck-screws/feed/ 4 stainless steel deck screws stainless steel deck screws Grip-Rite coated deck screws Grip-Rite coated deck screws Everbilt coated deck screws Everbilt coated deck screws for PT standard screw threads standard screw threads - nothing to see here. self-starting cut point Self-starting cut points reduce splitting dual-thread design dual-thread design reverse threads mushrooming Reverse threads reduce mushrooming Everbilt exterior wood screws Grip-Rite Star-Drive Deck Screws Deckmate Square Drive Stainless Steel Deck Screws
Types of Concrete Anchors and How to Use Them https://www.protoolreviews.com/types-of-concrete-anchors-how-to-use-them/ https://www.protoolreviews.com/types-of-concrete-anchors-how-to-use-them/#comments Tue, 26 Apr 2022 13:00:00 +0000 https://www.protoolreviews.com/?p=116823 Makita LXRH011 Brushless 1 in SDS-Plus Rotary Hammer drillingI have a deep dark confession to make: I love anchoring things to concrete. It’s a weird addiction. I started […]

The post Types of Concrete Anchors and How to Use Them appeared first on Pro Tool Reviews.

]]>

I have a deep dark confession to make: I love anchoring things to concrete. It’s a weird addiction. I started doing it in college. There are so many types of concrete anchors to choose from, but I completely skipped small plastic anchors and went straight for the heavy stuff. 1/2-inch or larger lead shields bolting multi-ton outdoor sculptures to concrete pads. Soon after, I switched to sleeve anchors. I finally moved to wedge anchors. Red Heads for those of you in the know. I’m not proud of it. I have tried to break the habit but after 35 years of doing it. I can’t stop. It is just too much fun—provided you do it the right way.

If you use concrete anchors the wrong way, you will have an incredibly frustrating experience. It could cause you to do great bodily harm to your power tools (possibly wanting to throw them in the nearest lake while uttering many profane words). Each anchor is installed using its own unique method, and each one has its own quirks. This can lead to frustration if you don’t know which one to use in which situation. Hopefully, this article will sort out any confusion.

Types of Concrete Anchors

You can find dozens of types of concrete anchors on the average construction site. I use several regularly.

The strongest anchoring systems utilize resin-based anchors you install with two-part epoxy. These appear most commonly on industrial and commercial sites and are too expensive or specialized for day-to-day use unless specified by an architect or engineer.

Some anchors feature bolt heads that snap off at a predetermined torque level. They leave the threaded bolt and flange to indicate the exact torque was used to tighten the anchors. These are also extremely expensive and relegated to projects where extremely tight tolerances and absolute safety is a must. Think long-span bridges or nuclear power plants.

Those of us who don’t work for companies that pay $600 for a toilet seat typically use the types of concrete anchors shown here:

Types of Concrete Anchors
A sample of the common types of concrete anchors. These include wedge anchors, sleeve anchors, large-diameter concrete anchors, lead shields, plastic anchors, and Tapcons (concrete screws)

Wedge Anchors and Sleeve Anchors

Both wedge anchors and sleeve anchors are excellent types of concrete anchors that hold a tremendous amount of weight. They provide strength for both pullout and shear force. Because of the spitting/wedging force they put on the concrete, try to avoid getting closer than 3-inches to the edge of the concrete. If you do, you risk splitting off a chunk of the slab. Of the two, wedge anchors provide the most strength—and are my personal favorite of all the anchors to use.

How to Install Wedge and Sleeve Concrete Anchors – Drilling

You install both wedge and sleeve anchors the same way. Drill the proper size hole with a hammer drill or rotary hammer drill and insert the anchor. Drive it in with a hammer. More on that below. The hole diameter is listed on the packaging and usually on the anchor itself. You will have to drill the hole at least a 1/4-inch deeper than the anchor.

Most types of concrete anchors for larger fixtures require anchoring in place
Drill through the base using it as a template whenever possible. Don’t mark your holes, move the base out of the way, install the anchors then try and lower the base onto the anchors. That is just asking for trouble as the slightest bump can deform the screw threads and ruin the anchors. You then have to start the process over again with new holes and anchors.

I recently wrote an article on how to drill through concrete. Also, if you are not familiar with the differences between a rotary hammer vs a hammer drill you might want to read that article as well. Both of these are necessary tools for concrete work.

Installing concrete anchors creates lots of dust
It is very important to remove the concrete dust before inserting the anchors. The dust changes the size of the hole and can make some anchors not fit correctly. The dust makes anchors come out easier as it acts as a lubricant. I like to use a blower bulb. If you use a dust extractor, this is when you need a HEPA filter for OSHA Table 1 compliance.

Driving in the Anchor

Once the hole is drilled and the anchor is inserted as far as it will go, drive the anchor in the rest of the way with a hammer or small sledgehammer, depending on the size anchor you are using. Be very careful here. Notice the photos below. There are two types of concrete wedge and sleeve anchors. High-quality premium brands have extra metal at the top of the bolt so you don’t deform the screw threads when hammering it in. If you use the cheap anchors, back off the nut so you will not be hammering on the end of the bolt. You want to be hammering on the nut instead and it will protect the threads (see the photo on the far right). Don’t use excessive force regardless.

You cannot remove wedge or sleeve anchors. Instead, you need to cut them off using a grinder or reciprocating saw. For the City of Lakeland’s Florida Outdoor Sculpture Competition, we replace the sculptures every year with new ones. Each sculpture bolts down to a concrete pad using wedge anchors. Rather than cut them off, we actually drill all the way through the 6-inch thick concrete pads to install the new sculptures.

Set the Concrete Anchor and Tighten the Nuts

The next year, after removing the outgoing sculpture, we simply hit the protruding anchor with a hammer driving it flush with the surface of the concrete. The pad is instantly ready for us to install the new sculpture. Drilling all the way through the pad lets water drain through. Otherwise, water in the holes can freeze and expand, causing the pads to crack.

Makita Impact Wrench fastening a concrete anchor
Using an impact wrench makes short work in the otherwise tedious task of tightening the fastener nuts with a wrench or socket

Once done installing the concrete anchors, tighten the nuts. While you can use a socket set or ratcheting open-end wrench to get in tight spaces. To save more time, especially when installing anchors with larger 3/4-inch or 1 1/8-inch bolt heads, invest in a cordless impact wrench. This really speeds up the process of tightening concrete anchors. If you don’t know the difference between an impact driver vs an impact wrench, check out a video we made on the subject.

Large Diameter Concrete Anchors

Large diameter concrete anchors, including Tapcon brand Heavy-Duty Anchors, have several big advantages over other types of concrete anchors. In particular, they can be removed, though not reused. Once removed though, you will not be able to reuse the hole. I have reused Tapcon concrete screws in noncritical, indoor workloads provided it goes in a freshly-drilled hole.

Tapcon Heavy Duty
Large diameter 3/4-inch x 8-inch concrete anchor

Another advantage of large-diameter concrete anchors is they can get closer to the edge of the concrete than a wedge anchor since they don’t expand.

Tapcon claims their large diameter concrete anchors are 20% stronger than wedge or sleeve anchors. They certainly install very quickly. You will not be able to install them with hand tools (perhaps the Incredible Hulk could). Use an impact wrench to install these large concrete anchors after drilling the appropriate size hole.

Lag Shields (Lead Shields) and Plastic Anchors

Lag shields (often called lead shields) and plastic anchors both work in the same manner. You drill the correct size hole, insert the anchor, and then drive in the screw. This expands the metal or plastic, wedging it in place. Use these for your lightest-duty anchoring. This goes double for plastic anchors—which we don’t recommend for concrete where you need higher pull-out strength. Plastic concrete anchors work for lightweight objects—perhaps 30 to 50 lbs depending on the size of the anchors.

Lead shields, while useful, have diminished in popularity due to the convenience of wedge and sleeve anchors. The latter provide a much stronger hold and most find them quicker to install and use. Lead shields do have one unique trick, however. You are supposed to use lag bolts with lead shields. You can, however, also use screw eyes (screw eyebolts) which have the same threads as lags. Lead shields are the only type of concrete anchor that allows this. Use a construction screwdriver to turn the screw eyes when it gets really tight.

At the Polk Museum of Art, we have lead shields permanently placed in our brick sculpture courtyard. In the event of a hurricane heading our way, we can install large eye screws in the ground, then lash down the sculptures to ready them for the storm.

Tapcon Concrete Screws

It is no exaggeration to say that Tapcons have changed the world. The first art gallery I worked in had brick walls and it was my job to hang the exhibits every month or two. It was such a huge pain drilling holes and installing plastic anchors. I would have killed for Tapcons back then, especially with an installation kit like the ones pictured below. Plastic anchors certainly didn’t do anything for the look of the walls after we removed the exhibit and all you saw were little colored circles on the wall.

Tapcons concrete screws

Powder Actuated Fasteners

Powder actuated fasteners are sometimes called Ramsets, which is a name brand. They are unique among anchors in that they do not require drilling a hole first. Instead, they use a .22 caliber low-velocity gunpowder charge to drive specially hardened nails through wood or metal into concrete. While fast, they can rupture the concrete around the nail, shifting the board you were trying to attach to it. My personal preference is to use them in cinder block walls and use wedge anchors in concrete.

Toggle Bolts – The Often Overlooked Type of Concrete Anchor

Speaking of cinder blocks, one of the most used anchors for cinder blocks is toggle bolts. They take advantage of the hollow cavity in the cinder blocks. Squeeze the anchor’s wings together folding them up into the smallest possible dimension. Drill a hole just big enough for the wings to pass through. Next, pass the wings through the hole into the hollow cavity where they will spring open. Pull back on the bolt so the wings grab and then tighten the bolt. Toggle bolts are very strong anchors. In the photo below, I replaced the bolt that comes with it with an eye bolt so I could tie a rope to the anchor.

Installation Tools for Various Types of Concrete Anchors

Basic Concrete Anchor Kit – Ideal for Tapcons up to 5/16-inch Anchors

  • Cordless hammer drill
  • Masonry bits
  • Tapcon bit or Tapcon installation kit
  • Small bulb or another method to blow or vacuum out the hole
  • Hammer
  • Adjustable wrench
  • PPE (hearing protection, eye protection, and a dust mask)
Concrete Anchoring Tool Kit
Just the basics for installing anchors into concrete

Mid-level Concrete Anchor Kit – Ideal for Tapcons up to 1/2-inch Anchors

  • Cordless rotary hammer
  • Masonry bits
  • SDS Plus Tapcon bits and installation kit
  • Dust blower
  • Hammer
  • Construction screwdriver
  • Socket set or ratcheting combination wrenches
  • PPE (hearing protection, eye protection, and a dust mask)
Concrete Anchor Kit
Lightweight rotary hammer drills make quick work of drilling concrete

Pro Concrete Anchor Installation Kit – Ideal for Tapcons up to 3/4-inch Anchors

  • Rotary hammer drill with built-in HEPA dust extraction
  • SDS Plus bits
  • SDS Plus Tapcon bits and installation kit (not shown)
  • HEPA dust extractor (not pictured)
  • 3 or 4 lbs engineering hammer
  • Construction screwdriver
  • Impact wrench with impact sockets and construction socket handle
  • Leaf blower to clean the surface after installation if needed
  • PPE (hearing protection, eye protection, and a dust mask)
Anchor kit for Concrete
Big anchors require big tools. The impact wrench makes tightening the nuts almost instant. The builtin dust extractor on the rotary hammer drill makes for a much cleaner jobsite

PPE – Personal Protective Equipment

Eyes and ears. That used to be every foreman’s mantra when he saw the OSHA inspector coming. “Eyes and ears, boys!” meant everyone needed to put on their eye and hearing protection. Now, it’s eyes, ears, and lung protection. This is especially true when working with concrete which contains silica, a known carcinogenic. To put it in plain English: concrete dust can cause cancer.

We have several articles on the topic:

Summarizing the Types of Concrete Anchors and How to Use Them

I have shown you many types of concrete anchors. There are actually many more than this, including hammer drive anchors, adhesive anchors, and epoxy anchors. You’ll find the ones in this article on most residential jobsites. Larger commercial or industrial sites might introduce the others. I have used every one of these for various reasons over the years, and each has its place. With the proper tools, all types of concrete anchors are fairly easy to install. Have fun drilling! I know I will.

Sculptor Hanna Jubran
Sculptor Hanna Jubran with his finished piece in the City of Lakeland’s 22nd Annual Florida Outdoor Sculpture Competition. This was taken right after this sculpture was bolted to the concrete pad using wedge anchors so it should be able to survive in Florida’s extreme weather

The post Types of Concrete Anchors and How to Use Them appeared first on Pro Tool Reviews.

]]>
https://www.protoolreviews.com/types-of-concrete-anchors-how-to-use-them/feed/ 3 Types of Concrete Anchors Wedge Anchor 2022-03-15 18.21.45 WEBSITE Concrete anchoring does Concrete anchor dust 2022-03-15 19.08.11 WEBSITE 2022-03-15 19.09.09 WEBSITE 2022-03-15 19.09.22 WEBSITE types of concrete anchors and how to install them Makita Impact Wrench Tapcon Heavy Duty Lead Sheid 2022-03-15 18.25.34 WEBSITE Tapcons concrete screws Ramset powder actuated fasteners commercial shelving secured to concrete powder actuated fastening to concrete wall Toggle Bolts squeezing a toggle bolt toggle bolt protruding through drywall Concrete Anchoring Tool Kit Concrete Anchor Kit Anchor kit for Concrete Hearing and Eye Protection Dust Mask Sculptor Hanna Jubran
Garvin Adjustable Depth Device Mud Rings https://www.protoolreviews.com/garvin-adjustable-depth-device-mud-rings/ https://www.protoolreviews.com/garvin-adjustable-depth-device-mud-rings/#respond Thu, 16 Dec 2021 16:00:00 +0000 https://www.protoolreviews.com/?p=114868 Garvin Adjustable Depth Device Rings Bring Convenience to Electrical Installations Garvin designed the Adjustable Depth Device Rings to work with […]

The post Garvin Adjustable Depth Device Mud Rings appeared first on Pro Tool Reviews.

]]>

Garvin Adjustable Depth Device Rings Bring Convenience to Electrical Installations

Garvin designed the Adjustable Depth Device Rings to work with square boxes for mounting switches, receptacles, and devices. Ideal for use in prefabricated assemblies in ceilings, walls, and floors, these device rings adjust for a perfect flush installation to finished surfaces.

What’s the Big Deal?

The Garvin Adjustable Depth Device Rings feature telescoping one-or two-gang inner rings that adjust from 3/4″ to 1-1/2″. This “wiggle room” is helpful when you’re dealing with incorrect mounting depths or other scenarios where the box edge isn’t flush to the edge of the drywall or other finished surface.

Garvin Adjustable Depth Device Rings

The telescoping inner ring adjusts via Phillips head screws inside the device ring. Simply turning the screw will raise or lower the inner ring with 3/4 of an inch worth of play.

Garvin has four models available right now. The AMR1 Square Single Device Ring and AMR2 Square Two Gang Device Rings fit to 4″ square boxes. The AMR11B One Gang Device Ring and AMR211B Two Gang Device Ring fit to 4-11/16″ square boxes.

Features and Benefits

  • Adjustable device rings allow a perfect flush installation to finished surfaces, ensuring that devices are securely fastened and well grounded to rings
  • Telescoping one or two gang inner ring adjusts to finished wall surface for a perfect fit every time
  • Great for prefabricated assemblies
  • UL, RoHS Compliant (two gang models)

Pricing

You can find the Garvin Adjustable Depth Device Mud Rings anywhere Garvin products are sold, or you can purchase them directly through the Garvin site.

ModelDimensionsWeightSizeAdjustmentPrice/Each
AMR15x4x4 in.0.485 lb4 Square3/4 to 1-1/2 in.$11.33
AMR25x4x4 in.0.1 lb4 Square; Two Gang3/4 to 1-1/2 in.$13.63
AMR111B3.5×5.63×7 in.0.105 lb424713/4 to 1-1/2 in.$25.83
AMR211B5x4x4 in.0.064 lb4-11/16 in; Two Gang3/4 to 1-1/2 in.$28.14

The post Garvin Adjustable Depth Device Mud Rings appeared first on Pro Tool Reviews.

]]>
https://www.protoolreviews.com/garvin-adjustable-depth-device-mud-rings/feed/ 0 Garvin Adjustable Device Rings03
Simpson Barn Doors Review – 49801 Cherry https://www.protoolreviews.com/simpson-barn-doors-review-49801/ https://www.protoolreviews.com/simpson-barn-doors-review-49801/#respond Mon, 08 Nov 2021 17:35:00 +0000 https://www.protoolreviews.com/?p=34936 Simpson sliding barn doorA while back we did an article on how to install a Simpson Craftsman door on a 1920s bungalow home. […]

The post Simpson Barn Doors Review – 49801 Cherry appeared first on Pro Tool Reviews.

]]>

A while back we did an article on how to install a Simpson Craftsman door on a 1920s bungalow home. It was an incredible update and really brought out the charm of the wraparound porch. Recently, we had the opportunity to follow up and review one of the Simpson barn doors for Pro Tool Reviews. We paired the interior door with Goldberg Brothers sliding barn door track hardware and add some privacy to the master bath. Currently, it has no door—just a 36-inch opening. To fully cover the doorway and add some style, we opted for a 3′ 6″ (42″) barn door made from Cherry.

Simpson Barn Doors Construction

Simpson offers its exterior and interior barn doors in a variety of wood styles, but more importantly, it really had the look and character he wanted for the home. The company makes doors in over a dozen different wood species. Want Fir, Alder, Ash, Cherry, Maple, Oak, or Walnut? No problem. Simpson makes the door’s long stiles using multiple pieces of wood instead of a single piece. This type of construction adds strength without changing the look of the door.

Simpson barn door cross section

The core of the Simpson barn door uses a finger-jointed construction with lots of glue surfaces. The outer edge band then blends into the 1/16″ vertical grain surface veneer to mask the joints. It’s a really robust door that should last forever.

Shipping a Door

I wouldn’t know how to ship a door in such a way as to keep it intact upon receipt. Simpson has this down pat. The Simpson barn door arrived plywood-crated and strapped to a couple of 2×4 stand-offs. Inside, veneer protected the door further, and we found absolutely no damage upon inspection. Other companies should take note.

Simpson barn door crated

Sanding and Preparation

While this Cherry Simpson Barn Door (Model #49801) would have looked great with just a clear coat, we needed to match an existing room. The door could be made to match the existing Cherry furniture easily with a nice coat of stain. We ultimately opted for a nice Red Mahogany which gave the Cherry barn door a beautiful reddish-brown hue that blended well into the room. We used a new Festool hybrid sander to prepare the door, starting from 100 grit.

Festool Hybrid Sanders cherry barn door

Between coats of stain, we sanded by hand using 320 grit, just to smooth down the grain. A great alternative would be to grab some Monocoat and do everything in one pass after sanding down to around 220. That’s probably how I’d do it the next time around. The final process included coating the door on both sides with two layers of satin polyurethane.

staining sliding barn door

The combined Cherry wood, styling, and finish produced absolutely stunning results. One thing about Simpson barn doors is that they finish well. The grain on the cherry door simply popped once we were finished.

stained cherry barn door

Installing the Simpson Barn Door and Hardware

Choosing barn door hardware may prove more difficult than actually installing Simpson barn doors. Once we settled on using the Goldberg Brothers barn door track (check them out here), we only needed to attach it to the door and wall. Quick Pro tip: railing systems rarely align to wall studs. This necessitates the use of an extended header or other means to ensure your steel track can support the weight of a heavy sliding barn door.

Goldberg Brothers barn door hardware
We used Goldberg Brothers barn door track which, aside from looking incredible, is well-built and can support even the heaviest solid wood doors.

The Goldberg Barn Track we used comes in black or silver and supports up to 400 pounds. That’s enough to hold me, my wife, and the door…possibly one of my kids as well. The actual door hanging hardware included nuts, washers, and bolts which matched the rail perfectly. The top-hanging system balanced the door evenly when sliding across the rail.

sliding barn door track hardware

Robust door stops are included for each end of the top track and felt pads let you soften the close on either end. To guide the bottom of the door you can opt for using a standard “T” door guide (requires routing a 1/4-inch channel in the door) or a “U” guide. As we had Berber carpet and a concrete slab, we opted for an aftermarket wall-mounted guide.

Simpson 49801 Barn Door Specs

  • Series: Interior Barn Doors
  • Type: Exterior Decorative
  • Applications: Can be used for a swing door, pocket door, by-pass door, with barn track hardware, with pivot hardware and for any room in the home.
  • Construction type: Engineered all-wood stiles and rails with dowel pinned stile/rail joinery
  • Panels: 3/4 in. flat panel with square V-groove and applied rail

Available Wood Species and Materials:

  • Fir
  • Alder
  • Ash
  • Cedar (Red)
  • Cherry
  • Hemlock
  • Hickory
  • Knotty Alder
  • Knotty Pine
  • Mahogany (Sapele)
  • Maple
  • Oak (Red)
  • Ponderosa Pine
  • Poplar (Paint Grade)
  • Poplar (Stain Grade)
  • Quarter Sawn Red Oak
  • Quarter Sawn White Oak
  • Walnut
  • White Birch
  • White Oak

Conclusion

Installing Simpson Barn Doors allowed us to create a much-needed privacy barrier for our bathroom. When doing a project like this, it’s nice to eliminate any potential issues. In our experiences, Simpson seems to provide consistent quality. The door arrived straight, square, and undamaged, and it had no imperfections or issues with taking stain. We had equal success with the hardware from Goldberg Brothers. Once that’s out of the way, you can just get the job done and enjoy your door.

Simpson Barn Doors cherry

I’d work with these doors again for myself or any customer who wants the refined look of hardwood with the many options, sizes, and wood species Simpson offers.

Pricing on these doors will vary by wood species and dealer, but start around $479 for the slab for a 42-inch wide interior barn door.

For more information, check out the Simpson Door website.

The post Simpson Barn Doors Review – 49801 Cherry appeared first on Pro Tool Reviews.

]]>
https://www.protoolreviews.com/simpson-barn-doors-review-49801/feed/ 0 Simpson barn door cross section Simpson barn door crated Festool Hybrid Sanders cherry barn door staining sliding barn door stained cherry barn door Goldberg Brothers barn door hardware sliding barn door track hardware sliding cherry barn door
Screw Bit Types and Types of Screwdriver Bits | Pros and Cons https://www.protoolreviews.com/screw-bit-types-screwdriver-bits/ https://www.protoolreviews.com/screw-bit-types-screwdriver-bits/#comments Fri, 19 Mar 2021 13:00:00 +0000 /ptr/buying-guides/buying-screwdriver Wurth Zebra Universal Bit Assortment05Manufacturers make screwdrivers to fit a wide variety of screw bit types. They come in various lengths, grips, and styles—all […]

The post Screw Bit Types and Types of Screwdriver Bits | Pros and Cons appeared first on Pro Tool Reviews.

]]>

Manufacturers make screwdrivers to fit a wide variety of screw bit types. They come in various lengths, grips, and styles—all so that they can do a great job fastening screws. But which types of screwdriver bits do you use for what application—and which work the best? We’ll attempt to go through each—even the specialty bits—and give you the Pros and Cons so you can understand each and choose the best bits for your application.

Remember when all screws were slotted? Thank goodness for innovation!

screw bit types for screwdrivers

How to Get the Screw Bits You Need

As you know, both drivers and bits can be purchased individually and in sets. For the best deal, we recommend purchasing a good bit set to build a robust screwdriver fastener collection. One set we really like includes the Wurth Zebra Universal Bit Assortment but you can find less expensive screw bit solutions as well.

Having all the screw bit types ensures you’re ready for the wide varieties of fasteners you’re likely to encounter. Of course, not only do you have to contend with the wide variety of screw bit types and fasteners, but most also come in several sizes. Using the right screwdriver bit types for their proper applications ensures you don’t damage the fasteners. It also tends to speed up the job. Keep this in mind when shopping for the best screwdriver set so you can handle the myriad of screws and fasteners on the job site.

Editor’s Note: Check out our best screwdriver sets article for our top recommendations.

Screwdriver Bit Types Explained

The various drive tips are made for a variety of reasons. Some are patented because they offer a unique solution to keeping a driver bit in place—others are simply better for the application they are intended for. In our opinion, the biggest reason for going with a particular screw bit type is getting a good grip on the fastener.

Fit and Grip Matters Most

The tip of the screwdriver or driver bit should always fit snugly into the fastener so as not to slip around when the fastener is turned (at either low or high speeds depending upon the application). Impact drivers are particularly adept at maintaining the bit’s connection to the fastener when used properly. 

Here is a quick look at some of the most common types of screws and fasteners you should have in your collection, and the drivers that fit them:

Phillips Head Screw Bits

The most common type of fastener has got to be the #2 Phillips head bit, but we’ve even seen adaptation here. The name “Phillips” comes from its inventor Henry F. Phillips in the 1930s. These types of screwdrivers have a pointed cross-head tip that matches a self-centering, cross-head screw. Believe it or not, Phillips heads were originally designed to cause the driver to cam out, to prevent over-tightening!

Pros

  • Commonplace
  • Inexpensive

Cons

  • Cam out easily

Check out our article What is Cam Out to learn more.

Phillips vs Pozidriv Screw Bits

Similar to Phillips bits, Pozidriv offers another four points of contact that grasps screws even more securely to protect against camout. Pozidriv screws and bits seem popular overseas, but we now see them appearing all over in the US market…and we love it!

phillips vs Pozidriv

Slotted or Flat Head Screwdriver Bits

Slotted or flat heat screwdrivers, one of the oldest types of screwdriver, started in the early 1800s. This type of screwdriver bit works with slotted screws that have a cut through the top of the head.

flat head screws

When choosing what size flat blade screwdriver to use, always make sure the tip is the width of the fastener and the bit fits snugly. If the flat head driver or bit wobbles in the screw—you can slide right off the head.

The advantage of this screw lies in its simplicity. Everything else presents a stark disadvantage. In general, most Pros try not to use these unless absolutely necessary. Can you guess where you find these most often? If you guessed “light switch plate covers” or “outlet covers”, you’d be correct!

flat-head screw driver bit types

Pros

  • Decorative
  • Commonplace
  • Inexpensive

Cons

  • Everything else

Hex or Allen Head Screws and Bits

We refer to hex head screws as Allen screws. These are a useful type of fastener because of how effectively they limiting the amount of slip. An Allen or hex screw bit often makes its way into furniture but even automotive applications use them. We also find these types of screwdriver bits on bicycles.

Allen hex bits - types of screwdriver bits

Pros

  • Commonplace
  • Inexpensive
  • Handles medium to high torque well

Cons

  • Can strip out under higher torque loads
  • Metric and SAE sizes cause stripping due to mismatching

Torx Bits and Torx Plus Bits

TORX head screws and bits also commonly get referred to as Star bits. These-six-pointed bits resist slippage or cam-out better than slot head or Phillips head designs. In fact, TORX head bits and screwdrivers were specifically designed to prevent it.

screw bit types

Pros

  • Handles medium to high torque well

Cons

  • Can strip out under high torque loads
  • Typically more expensive

Torx vs Torx Plus

An adjustment to Torx, Torx plus took that star design and squared off the edges. That resulted in more surface-contact area. Of the many types of screwdriver bits on the market, Torq Plus might just be the most grippy and stable. To make things even more complicated, Torx Plus security bits have just 5 lobes instead of 4.

torx plus bits

Pros

  • Handles high torque well

Cons

  • Typically more expensive
  • Less commonly found

Square Drive Screw Bit Types

Square drive bits, sometimes referred to as Robertson bits, find their home in a variety of places. The leading place might just be electrical boxes and panels where they seem almost ubiquitous.

Some manufacturers of deck screws also use this style of drive—particularly with stainless steel wood screws. Stainless steel fasteners tend to be very soft if you don’t buy the right kind. Common trim head screws also use square drive bits and feature a very small head for countersinking into cabinets.

Pros

  • Commonplace
  • Inexpensive
  • Handles medium torque well
  • Works great for smaller head sizes (trim screws)

Cons

  • Can strip out under higher torque loads (cheap stainless)

Triple Square Drive Bits

Triple square drive bits show up mostly in German automotive applications. We find them on BMW, Mercedes, VW, Audi, Porche, and other German automobiles. They work really well for high-torque applications like cylinder head bolts and components found in the drive train.

triple square drive bits - types of screwdriver bits

Triple square fasteners are typically made of hardened steel and are also tempered. This is so they can withstand the required torque without stripping out the star points.

Pros

  • Excellent high torque capability

Cons

  • Expensive
  • Less common use in the US market aside from German vehicles

Triple Square vs Double Hex Bits

Double hex is a screw drive featuring two offset hex drives. It can be driven by standard hex key tools. While the shape resembles a triple square, it’s actually incompatible. It also strips far more easily.

While, potentially, they can handle more torque than a standard six-point bit, they require better build quality to avoid stripping. This is one of the rarest types of screwdriver bits. Almost no one encounters these bits or their associated bolts unless you remove head bolts from certain Toyota or Lexus cars.

Wrapping Up the Various Screw Bit Types

In addition to screw bit types, you also have various finishes and coatings to look at. Most quality fasteners feature either a galvanized, nickel-chrome, stainless steel, or coated finish. Each has various strengths, so pay attention to your needs.

While some types of screwdriver bits are less common, at the very least, be sure to keep a handy assortment of both straight, Philips, Torx, and square head screwdrivers and bits on hand.

The post Screw Bit Types and Types of Screwdriver Bits | Pros and Cons appeared first on Pro Tool Reviews.

]]>
https://www.protoolreviews.com/screw-bit-types-screwdriver-bits/feed/ 7 screw bit types for screwdrivers phillips vs Pozidriv flat head screws 2-hour fan timer switch Allen hex bits screw bit types torx plus bits triple square drive bits
Best Drywall Anchors for Mounting TVs and Other Heavy Items https://www.protoolreviews.com/best-drywall-anchors/ https://www.protoolreviews.com/best-drywall-anchors/#comments Mon, 05 Oct 2020 12:00:00 +0000 https://www.protoolreviews.com/?p=61999 Best Drywall Anchors for Mounting TVs and Other Heavy ItemsWe don’t know too many people who haven’t had the “privilege” of installing drywall anchors for some reason or another. […]

The post Best Drywall Anchors for Mounting TVs and Other Heavy Items appeared first on Pro Tool Reviews.

]]>

We don’t know too many people who haven’t had the “privilege” of installing drywall anchors for some reason or another. That, of course, brings up the question of what are the best drywall anchors for mounting TVs and other heavy items on your wall? The Pros in our office got together to discuss our favorites and exchange ideas on which drywall anchors perform the best in various scenarios.

Brief Summary of Our Views on Using Drywall Anchors

Overall, we value two things the most when picking the best drywall anchors for any job: capacity and convenience. The best drywall anchor has to instill us with the confidence that it can hold the item we plan to mount. It also helps if that drywall anchor installs easily without a ton of fuss.

Those two things guide all of our recommendations, so realize that what we recommend here, we also use ourselves. Combined, we had over 100 years experience hanging items on drywall to draw from. Hopefully, our experience helps you if you find yourself just starting out.

Best Drywall Anchors for Mounting TVs and Other Heavy Items

Traditionally, toggle bolts had served as the go-to for hanging heavy items on drywall. More recently, however, several of our crew have used Snaptoggles which present the same (or better) holding power and more features. Whereas a toggle bolt works once—you lose the back piece if you remove the bolt—Snaptoggles stay in the wall when you remove the bolt. This makes them infinitely more useful. We think they make the best drywall anchors for mounting TVs and other heavy items.

installing Snaptoggle drywall anchor

Toggler Snaptoggles do require you to drill a 1/2″ hole. However, it’s fool-proof for lining up your mount holes when placing a TV mount on a wall, for example. Snaptoggles let you insert the bolt through the mount directly into the affixed anchor. The hole in the mount only needs to fit the bolt—not the wider diameter of the toggle.

Editor’s Note on Holding Force: These drywall anchors claim to have both very high pull-out (tensile) values (hundreds of pounds!) and shear force weight—even on the small 3/16″ size models. Both are important as heavy items can both pull down on the hanging mount and also pull away from the wall. For heavy items like TVs, we still recommend you attempt to attach at least one side of the mount to a stud. That converts a majority of the remaining attachment points into requiring shear force as opposed to a tensile force. This is particularly important with articulating TV mounts and over-the-range microwave ovens, for example. Do it wrong, and you’ll soon need to learn how to patch a hole in drywall.

You can read the instructions from the Toggler website, but the gist involves drilling a hole, inserting the Snaptoggle, pulling the strap tight to cinch it up, and then snapping off the plastic pull straps. What’s left is the receptacle for your included machine-thread bolt. Simpson Strong Tie also makes a version of this called FlipToggle that works just as well.

We’ve indeed used these for TV mounts, over-the-range-microwaves, heavy wall mount sconces, vanity lights, and even heavy mirrors.

Best Drywall Anchor for Heavy Mirror

Just to clarify, if you want to hang a mirror, we classify that as a heavy item—not at all like hanging a simple picture. For heavy mirrors, we again turn to either the Simpson FlipToggle (see the link above) or the Toggler Snaptoggle which you can find at Lowe’s.

best drywall anchor for heavy mirror

Like anything heavy, we always prefer catching a stud. If you can’t, however, using a FlipToggle or Snaptoggle gives you the pull-out strength needed to support something as heavy as a large mirror. Of all available options, these present the best drywall anchor for heavy mirrors and similar items.

Best Drywall Anchors for Medium-Heavy Items (50-100 lbs)

When you find something that works, you tend to stick with it. However, instead of rehashing the above recommendations (which indeed work here), let’s look at another option.

While standard self-drilling plastic anchors can safely hold up to 50 pounds, the still have relatively low pull-out force. To combat this, the best drywall anchors for medium-heavy items actually split (on purpose) once you insert the screw. These anchors support as much as 75 pounds per anchor.

Best Drywall Anchors for Heavy Shelving, Floating Shelves, and Cabinets

For heavy shelving, floating shelves, and cabinets, we always want to hit a stud. That means you want to secure as many brackets as possible to a stud (or cinderblock on an exterior block wall). Check out our article on how to use a stud finder if you’re not certain how to locate a stud. Drywall anchors work very well to protect against the “shear” force that pushes directly down the wall onto the fastener. For shelving, however, you must ensure the bracket or attachment point doesn’t pull out from the wall when you add weight.

Check out our recommendations on the best stud finders.

Once you secure the bracket to a stud or block wall, using self-drilling plastic drywall fasteners works well to handle other attachment points that may not be under as much tension or stress. Once again, we recommend the split-style anchors for up to 75 pounds of support per anchor (see photo above).

Best Drywall Anchors for Medium Weights (25-50 lbs)

For medium-weight items, we pay attention to ease of use. On the lighter side, we like EZ-Anchor self-tapping drywall anchors. Many years ago when they first came out, we started using both plastic and metal versions of these handy products.

E-Z Ancor hollow drywall

In some instances, the metal versions can “spin loose” in the drywall if you happen to use a power tool to insert the screw. We find the screws can have a tight fit sometimes. The plastic versions always seem to work well and are ideal for items under 50 pounds in weight. We typically have a couple of boxes of these on-hand.

Best Drywall Anchors for Light Weights (Up to 25 lbs)

On anything lightweight, you can almost go with anything—including unconventional solutions like Super Hooks picture hangers or a picture hanging kit that uses hooks and nails. Just don’t use either of these solutions if the item you hang tends to pull away from the wall with any significant force.

Super Hooks picture hangers

The advantage of these solutions, of course, has to do with the relatively easy removal and cleanup. Both solutions leave only a very small hole to fill with drywall spackle or mud if you need to relocate something and/or repaint.

Given how easy these hooks and systems install, we prefer them over the hassle of drilling and using larger anchors for tasks that hardly stress their potential.

Best Drywall Anchors for Curtain Rods and Towel Bars

Unless you plan to use heavy black-out curtains, we often find that curtain rods and curtains fall under 50 pounds of total weight. That opens up your available options. Another thing we find is that studs are often nearby when mounting curtain rods.

hanging bathroom towel bar shelf

Whenever possible, use a small drill bit and drill to check for the presence of studs when installing curtain rods. Then, once you strike wood, use an appropriate wood screw to secure the rod to the wall in those locations. For the rest, a conventional self-drilling drywall anchor should suffice.

When dealing with how to install a towel rack, you want a very strong hold to the wall. Because the placement of these bars often doesn’t give you as much flexibility, you may miss out on hitting studs. We recommend the use of strong splitting plastic self-drilling anchors at the very least. Even better, go with those Simpson Strong Tie FlipToggle or the Toggler Snaptoggle recommendations from earlier.

Best Drywall Anchors for Ceiling

Why would you ever hang something from the ceiling? We can think of several instances in the garage. You may want to install a suspended bike hanger. Or, how about ceiling-mounted storage for your camping gear? In any case, whenever anchoring something to the ceiling, you must use a fastener with high tensile or pull-out strength. We also recommend using a stud-finder to locate studs whenever possible.

best drywall anchor for ceilings

Some of the above recommendations work great. You can also look for metal self-drilling toggle anchors. Like toggle bolts, these feature a metal “backing” that pulls against the drywall once you insert the screw. You then cinch it up tight against the drywall and it supports up to 85 pounds per fastener.

How to Install Drywall Anchors

We wrote a pretty thorough article on how to install drywall anchors. Be sure to check that out for all of the details. We deal with all sorts of anchors, from plastic sleeve anchors to self-drilling threaded anchors and even molly and toggle bolts.

All of these drywall anchors achieve the same basic result. Once installed, they expand and grip the drywall.

Can You Reuse Drywall Anchor Holes?

So one of the chief issues with most drywall anchors tends to be reusability. With simplistic anchors, often removing the screw damages the grip of the anchor by backing it out of the hole and causing minor damage to the point of entry. At that point, you greatly reduce the stability and effectiveness of the anchor.

Toggle bolts, while strong, fall into the wall cavity when the threaded machine bolt or screw gets removed. Since they typically hold a device to the wall—like a bracket or TV mount, you must remove the bolt completely to remove the bracket or mount. This leaves you with a hole. Fortunately, you can just insert another toggle bolt and re-attach.

SnapToggle or Toggler drywall anchor

Which brings us to our favorite anchor—the Toggler or SnapToggle. Since these fasteners create a secure receptacle for the threaded bolt or screw, you can actually remove the screw—leaving the threaded female portion of the anchor in place. When dealing with microwave wall-mounts or flat-panel television mounts—these really make sense.

How to Fill, Patch and Fix Anchor Holes in Drywall

The great thing about drywall is that it’s generally easy to patch and repair. While you may run into instances where large areas need replacing, small patches don’t take much effort or time. When removing something from the wall that used a drywall anchor you want to make it look like the anchor never existed.

To do this, just remove the screw, sink the anchor a little more, and apply a dab of painters caulk or drywall mud. After a little paint, it just disappears. Most walls have some sort of texture to them, making it even easier to hide small drywall anchor holes.

How’d We Do?

Do you agree with our suggestions? Disagree? Leave a comment below and let us know your favorite drywall anchors or tips on getting the best results.

The post Best Drywall Anchors for Mounting TVs and Other Heavy Items appeared first on Pro Tool Reviews.

]]>
https://www.protoolreviews.com/best-drywall-anchors/feed/ 12 installing Snaptoggle drywall anchor best drywall anchor for heavy mirror Best-Drywall-Anchors-for-Medium-Heavy-Items E-Z Ancor hollow drywall Super Hooks picture hangers picture-hanging-kit hanging bathroom towel bar shelf Toggler-Snaptoggle-drywall-anchor best drywall anchor for ceilings SnapToggle or Toggler drywall anchor
Klein Cable Stapler for Romex, Voice, and Data https://www.protoolreviews.com/klein-cable-stapler-romex-voice-data/ https://www.protoolreviews.com/klein-cable-stapler-romex-voice-data/#comments Fri, 10 Jul 2020 13:00:00 +0000 https://www.protoolreviews.com/?p=58560 Klein Cable StaplerSecure Your Wire and Cable with Klein Cable Stapler Klein has introduced the Loose Cable Stapler to its expanding line […]

The post Klein Cable Stapler for Romex, Voice, and Data appeared first on Pro Tool Reviews.

]]>

Secure Your Wire and Cable with Klein Cable Stapler

Klein has introduced the Loose Cable Stapler to its expanding line of VDV installation and Romex solutions. With a forward action design, you’ll get stable and secure installation of wire and cable.

10-Second Summary

  • Model: Klein 450-100
  • Drives Klein insulated staples for VDV and Romex
  • Stsaple sizes: 1/4, 5/16, and 11/32 in.
  • One-handed forward operation
  • Channel cable guide
  • Cast aluminum body
  • Adjustable force setting lever
  • Jam-resistant
  • Price: $39.97

Features

The Klein Cable Stapler works with the brand’s own proprietary insulated staples to secure your various cables and wires.

Klein Cable Stapler

Klein designed it for simple one-handed operation. The handle is designed to be pushed rather than squeezed, making for easy and consistent performance. The ergonomic “reverse” action reminds us of the popular Arrow Powershot 5700 stapler.

Klein acknowledges that many cable staplers exist on the market, but maintain that they have an advantage over others. This comes down to the adjustability of theirs. It can handle multiple insulated staple sizes, working with 1/4″, 5/16″, and 11/32″ insulated staples. It works on various jobs that call for anything from speaker wire to CAT3-CAT6A, Coax, or even Romex 14/2-12/3G.

Klein fashioned this lightweight stapler from cast aluminum which also gives it better durability over steel. It has cushioned grips for easier stapling—helpful if you do a lot of staples in sequence. You can adjust a force setting lever to dial in the power, and a cable guide keeps your work neat and tidy.

You can pick up the Klein Loose Cable Stapler for $39.97. It comes with Klein’s Limited Lifetime Warranty that they include with all their hand tools.

Klein Cable Stapler Specs

  • Model: Klein 450-100
  • Application: Securing VDV and Romex Cable
  • Uses Klein insulated staples (450-001, 450-002, 450-003, 450-004)
  • Crown width: Adjustable 1/4, 5/16, 19/32 in.
  • Leg length: Adjustable 1/4, 5/16, 19/32 in.
  • Staple capacity: 20 to 30
  • Wire guide
  • Material: Cast aluminum
  • Dimensions (LxHxW): 7.5 x 1.75 x 6.5 in.
  • Weight: 1.7 lbs.
  • Warranty: Limited lifetime
  • Price: $39.97

The post Klein Cable Stapler for Romex, Voice, and Data appeared first on Pro Tool Reviews.

]]>
https://www.protoolreviews.com/klein-cable-stapler-romex-voice-data/feed/ 3 Klein 450-100 loose cable stapler
Tool Hangerz for Pegboard and Direct Fasten https://www.protoolreviews.com/tool-hangerz/ https://www.protoolreviews.com/tool-hangerz/#respond Tue, 21 Jan 2020 12:00:03 +0000 https://www.protoolreviews.com/?p=52464 large universal tool hangerWe hang a lot of tools in our shop. Typically, we grab the traditional tool hangers available at Home Depot […]

The post Tool Hangerz for Pegboard and Direct Fasten appeared first on Pro Tool Reviews.

]]>

We hang a lot of tools in our shop. Typically, we grab the traditional tool hangers available at Home Depot or Lowe’s. Recently, however, we got a chance to look at some products from Tool Hangerz. That’s not a typo, so be sure to spell it right when you look it up.

Pros

  • Lots of options to fit many tool types
  • Pegboard and direct-fasten styles
  • Free shipping when you order $25 or more

Cons

  • Fairly expensive for what you get
  • No hand tool holders
  • Not sold in kits

Recommendation

We like the build quality, options, and creative designs of the Tool Hangerz. While better and more flexible than most of the pegboard or direct-fasten hangers you’ll find at your local home improvement warehouse, they do cost a bit more and focus primarily on power tools as opposed to an all-in-one solution.

Tool Hangerz – A New Hanger in Town

I’m simply not going to write a 900-word treatise on tool hangers. You use them. We use them. They’re made of wire and hold your tools—either to pegboard or to plywood or some other material in your shop, shed, or garage.

traditional pegboard tool hangers
One of our existing cordless tool walls using traditional pegboard tool hangers available at your local home improvement warehouse.

The trouble, as you see above, is that not many designs exist—at least not that we’ve come across. When Tool Hangerz offered to send us some of their tool hangers to check out, we gave them a hearty “yes” and had them sent them our shop.

Tool Hangerz operates under the guidance of Jordan and Hillary, a young couple who took over the business in October of 2018. These are American-made products they hope will work well for people ranging from DIYers, Pros, or even retailers looking to set up various display items in a storefront.

What Kind of Tool Hangers are Available?

While you can perhaps get something cheap at the local big box store to tackle a full-sized drill or some hand tools, Tool Hangerz expands their repertoire.

The company makes hangers for circular saws, jigsaws & batteries, large power tools, drills, nailers, sanders & routers, and more. Some of the hangers feature flat surfaces that you can set tools, accessories, or batteries on.

They also make these items in both pegboard style as well as direct-attach. For the latter, a simple large screw or screw/washer combo will affix it to any wood surface. We used a combination of Tool Hangerz products to redo our above “grab-and-go” tool wall that serves our Shop:

Tool Hangerz pegboard power tool hangers
A bit more organized and flexible with easier and more stable hanging power tool storage for things like 12V/18V drills.

Of course, they also make locking J-hooks and other general utility hangers as well. Conspicuously absent are any hangers for hand tools like screwdrivers, pliers, and such. Instead, ToolHangerz focuses primarily on hanging power tools.

Here’s a list of what’s available (see the site—link below—for the full breakdown):

  • 14-inch shelf
  • 8-inch shelf
  • Battery/jigsaw holder
  • Circular saw hanger
  • Cradle/drill hanger
  • Large universal tool holder
  • Sander/router hanger
  • Small universal hanger
  • Vertical cordless drill holder
  • 3-hook utility hanger
  • Locking J-hooks
  • Half-circle universal hanger (direct fasten only)

What Kinds of Tools Can I Use with Tool Hangerz?

You can hang any number of tools using the Tool Hangerz pegboard or direct-attach hangers. We tried out several, but these are a few of our favorite (things):

cradle drill pegboard hanger

Everyone has drills. For the shop, you can just put them in a drawer. But, if you use them as frequently as we do, a cradle-style holder like this makes them easy to grab and replace.

circular saw pegboard hanger

We were pleasantly surprised to find a way to easily store a circular saw on the wall. While not strong enough for rear-handle or larger circular daws, this Makita 18V brushless circular saw (one of our favorites) stores nicely.

Finally, we really like the large universal tool holder which lets us store a Milwaukee M18 FUEL HackZall right on the wall.

large universal tool hanger

Conclusion

Whether you buy Tool Hangerz for hanging your tools on pegboard or other shop locations depends on your needs and budget. Compared to the $2 and $3 options at the home improvement warehouses, you should expect to pay a bit more. Still, Tool Hangerz fit our tools better—and a wider variety of them.

Perhaps the perfect solution is a combination of cheap hangers for what fits and Tool Hangerz for those tools that need a more specialized type of holder.

You can order Tool Hangerz online and get a 10% discount when you use the code PROTOOLREVIEWS (we may make a small commission when you do).

Shop with Code: PROTOOLREVIEWS


The post Tool Hangerz for Pegboard and Direct Fasten appeared first on Pro Tool Reviews.

]]>
https://www.protoolreviews.com/tool-hangerz/feed/ 0 traditional pegboard tool hangers One of our existing cordless tool walls using traditional pegboard tool hangers available at your local home improvement warehouse. Tool Hangerz pegboard power tool hangers A bit more organized and flexible with easier and more stable hanging power tool storage for things like 12V/18V drills. cradle drill pegboard hanger circular saw pegboard hanger large universal tool hanger
Eagle Claw Hidden Deck Fastening System https://www.protoolreviews.com/trades/carpentry/eagle-claw-hidden-deck-fastening-system/28324/ https://www.protoolreviews.com/trades/carpentry/eagle-claw-hidden-deck-fastening-system/28324/#respond Mon, 27 Feb 2017 13:30:00 +0000 https://www.protoolreviews.com/?p=28324 Eagle Claw Hidden Deck Fastening SystemThere are several methods and products for building a beautiful deck without unsightly fastener holes that can split over time. […]

The post Eagle Claw Hidden Deck Fastening System appeared first on Pro Tool Reviews.

]]>

There are several methods and products for building a beautiful deck without unsightly fastener holes that can split over time. The Eagle Claw Hidden Deck Fastening System uses black decking clips to space and secure boards while concealing fasteners beneath the deck’s surface.

Eagle Claw Hidden Deck Fastening System Details

Decking boards must have a dado on each side to accommodate the decking clips. Pre-grooved boards are available or the carpenter can use a router to create the groove. The first board of the deck can be fastened in a traditional manner. Then decking clips are inserted into the grooves of each successive board while a decking wrench holds the boards and clips securely during the fastening process.

For more information, visit www.eagleclawco.com.

Our Take

If you’re going for a clean, professional look on deck builds for your clients, hidden fastening systems are the way to go. There are several options like the Senco Mantis system and Camo Edge Pro fastening system that we’ve previously covered. Eagle Claw is more akin to the Senco system (and Tiger Claw for that matter) with a clip style of fastening.

Like other options on the market, you’ll need to order pre-grooved deck boards or cut them in yourself to take advantage of the system. It solves the end board issue by countersinking the screws and plugging them.

Eagle Claw Hidden Deck Fastening System

Once you have the end board screwed down, the installation process is pretty straightforward. Place the appropriate number of clips in the groove of your deck board, and lay the next board down opposite, ensuring that clips find the groove there as well. Use the Eagle Claw deck clamp to pull the boards together and set your screws. Multiple boards can be clamped at once to speed things up a bit.

While this system is no more difficult than most other options and the build of the clips looks solid, I think Senco retains the upper hand. Their Mantis system also lifts the boards slightly off the joist, allowing more airflow around the boards so they don’t trap moisture. Of course, this isn’t as big a concern with composite decking.

At the end of the day, the build quality is what will attract Pros to Eagle Claw from the rest of the pack. By using a combination of stainless steel core inside a glass filled nylon housing, perhaps the Eagle Claw Hidden Deck Fastening System will last longer than painted steel clips.

The post Eagle Claw Hidden Deck Fastening System appeared first on Pro Tool Reviews.

]]>
https://www.protoolreviews.com/trades/carpentry/eagle-claw-hidden-deck-fastening-system/28324/feed/ 0 eagle claw1
New DAP DynaGrip Construction Adhesives Preview https://www.protoolreviews.com/dap-dynagrip-construction-adhesives/ https://www.protoolreviews.com/dap-dynagrip-construction-adhesives/#comments Thu, 23 Feb 2017 13:00:54 +0000 https://www.protoolreviews.com/?p=28376 DynaGrip construction adhesivesDAP recently announced its new DAP DynaGrip construction adhesives including latex, solvent, and hybrid formulas designed to deliver bonds in […]

The post New DAP DynaGrip Construction Adhesives Preview appeared first on Pro Tool Reviews.

]]>

DAP recently announced its new DAP DynaGrip construction adhesives including latex, solvent, and hybrid formulas designed to deliver bonds in a matter of hours in all weather conditions. DynaGrip adhesives are compliant with stringent Volatile Organic Compound (VOC) regulations and appropriate for the installation of subfloors, drywall, heavy remodeling, and new construction.

Our Take on DAP DynaGrip

There’s a good chance that you’ve used DAP products whenever you’ve had to caulk, foam, seal, patch, or adhere materials to each other. Their Alex caulk remains a staple of painters everywhere. It’s no surprise: since its humble beginnings in the 1860s as a maker of sealing wax for food canning, DAP has innovated and acquired other innovators to offer a deep line of products to its customers. There’s even an Invention Submission tab on DAP’s website today. How cool is that—a company that not only does its own R&D but also understands sometimes great ideas comes from the jobsite or just a tinkerer in his shop?

“Formulated with the latest adhesive technologies and DAP’s commitment to quality and performance, professionals can count on the versatility and strength of DynaGrip products to get even the toughest jobs done right the first time. DynaGrip provides a grip that outperforms, ensuring a durable, long-lasting bond.”

Kate Piche, Group Product Director at DAP

Bonding Like a Mechanical Fastener

As any woodworker can tell you, the beauty of a good adhesive is the bond strength advantage it has over mechanical fasteners. Two pieces of wood screwed together will pull apart more easily than if the pieces were glued together with a high-quality adhesive. In fact, the wood would likely rip along its grain before the bond failed.

Adhesives have other advantages, as well: they don’t loosen, corrode, or split/damage the material. And So DAP has introduced what very well seems like a superior line of DAP DynaGrip construction adhesives. The new products offer those advantages as well as fast curing in any weather condition and safe application.

Below you’ll see a breakdown of each new DynaGrip product. We really like the project specificity, so we know we’re using the right adhesive for the job. There is an all-purpose adhesive, too, but narrowing the project scope down to drywall, or tub surround, or mirror-marble-granite is quite helpful. And knowing that these adhesives set up quickly no matter how hot or cold it is inside or out gives us peace of mind and the ability to get on with the rest of the job.

New DAP DynaGrip Construction Adhesives

DAP DynaGrip Heavy Duty

  • DAP DynaGrip Heavy Duty for heavier remodeling jobs. This high-performance latex technology provides a strong permanent bond. DAP DynaGrip also bonds a wide range of building materials for interior and exterior construction jobs.
  • DAP DynaGrip Heavy Duty Max features hybrid technology which DAP claims delivers much higher strength for tough applications where bond strength and speed are critical.

DAP DynaGrip Subfloor

  • DAP DynaGrip 4000 Subfloor offers a high-strength weatherproof bond on wet, frozen and treated lumber, this can be applied in freezing temperatures. It’s PFS certified to exceed ASTM D 3498 specifications.
  • DAP DynaGrip Advanced Subfloor provides a weatherproof bond that improves the structural performance of subfloor assembly. This solvent-based adhesive won’t freeze and has a VOC-compliant formula that exceeds ASTM D 3498 specifications.
  • DAP DynaGrip Subfloor is a VOC-compliant adhesive that helps prevent floor squeaks. This adhesive meets ASTM D 3498 specifications.
DAP Dynagrip Construction Adhesives

DAP DynaGrip Project Specific

  • DAP DynaGrip Mirror-Marble-Granite features hybrid technology that DAP claims to deliver faster bond strength. With permanent vertical hold in one hour, this formula is for installation of mirrors and countertops. DynaGrip Mirror-Marble-Granite is safe to use on granite and marble.
  • DAP DynaGrip Tub Surround is specifically formulated for installing tub surrounds. It’s guaranteed safe for showers, and won’t burn or etch surrounding material. It applies white and dries clear.
  • DAP DynaGrip Wood-Panel-Trim for bonding all trim materials including wood, foam, and PVC. This latex formula features instant grab.
  • DAP DynaGrip Drywall prevents nail pops and helps limit sound and air movement between walls. This instant grab formula is for installing drywall panels on vertical walls and ceilings.
  • DAP DynaGrip Foamboard adheres all foamboard materials to a wide range of substrates. It does so without the risk of etching or burning through. It’s compatible with XPS (extruded) and EPS (expanded) foam boards.

All-Purpose

  • DAP DynaGrip All Purpose is for interior projects which require a strong permanent bond. This VOC-compliant formula provides adhesion to common building materials and features instant grab.

The post New DAP DynaGrip Construction Adhesives Preview appeared first on Pro Tool Reviews.

]]>
https://www.protoolreviews.com/dap-dynagrip-construction-adhesives/feed/ 1 PTIA 2017 Winner DAP DynaGrip construction adhesive