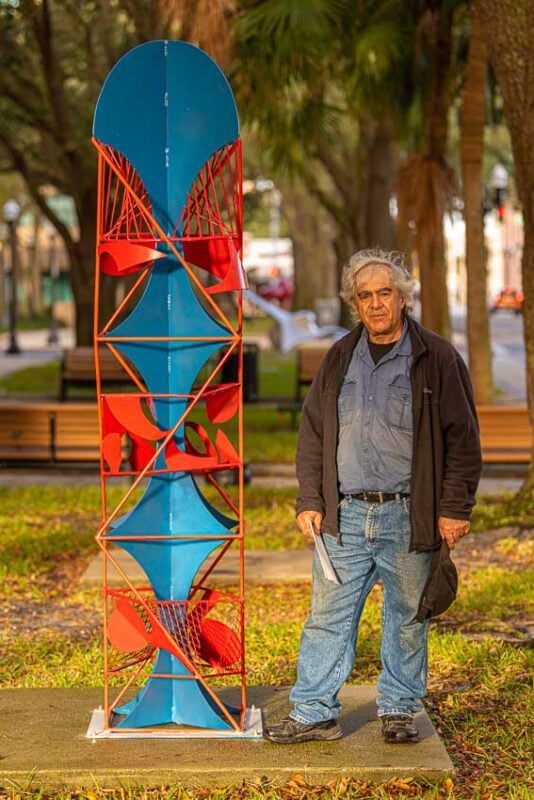
I have a deep dark confession to make: I love anchoring things to concrete. It’s a weird addiction. I started doing it in college. There are so many types of concrete anchors to choose from, but I completely skipped small plastic anchors and went straight for the heavy stuff. 1/2-inch or larger lead shields bolting multi-ton outdoor sculptures to concrete pads. Soon after, I switched to sleeve anchors. I finally moved to wedge anchors. Red Heads for those of you in the know. I’m not proud of it. I have tried to break the habit but after 35 years of doing it. I can’t stop. It is just too much fun—provided you do it the right way.
If you use concrete anchors the wrong way, you will have an incredibly frustrating experience. It could cause you to do great bodily harm to your power tools (possibly wanting to throw them in the nearest lake while uttering many profane words). Each anchor is installed using its own unique method, and each one has its own quirks. This can lead to frustration if you don’t know which one to use in which situation. Hopefully, this article will sort out any confusion.
Table of Contents
Types of Concrete Anchors
You can find dozens of types of concrete anchors on the average construction site. I use several regularly.
The strongest anchoring systems utilize resin-based anchors you install with two-part epoxy. These appear most commonly on industrial and commercial sites and are too expensive or specialized for day-to-day use unless specified by an architect or engineer.
Some anchors feature bolt heads that snap off at a predetermined torque level. They leave the threaded bolt and flange to indicate the exact torque was used to tighten the anchors. These are also extremely expensive and relegated to projects where extremely tight tolerances and absolute safety is a must. Think long-span bridges or nuclear power plants.
Those of us who don’t work for companies that pay $600 for a toilet seat typically use the types of concrete anchors shown here:

Wedge Anchors and Sleeve Anchors
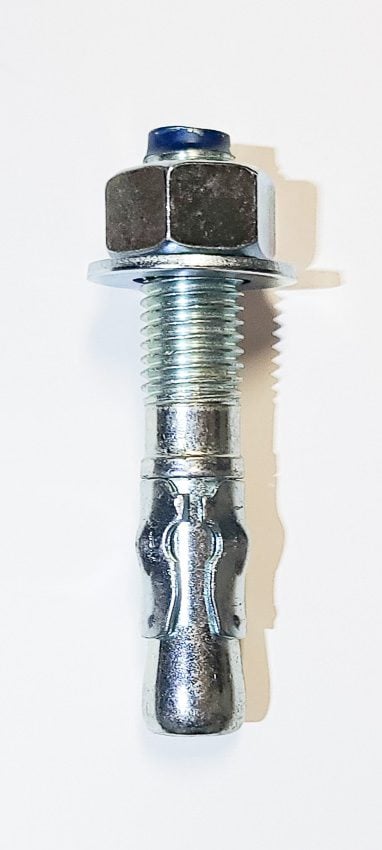
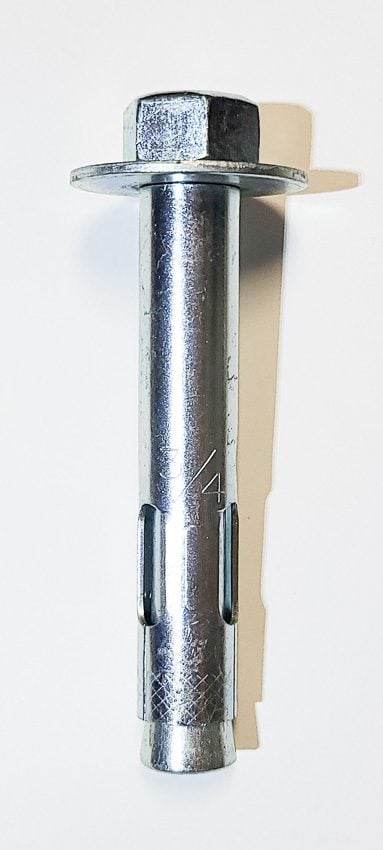
Both wedge anchors and sleeve anchors are excellent types of concrete anchors that hold a tremendous amount of weight. They provide strength for both pullout and shear force. Because of the spitting/wedging force they put on the concrete, try to avoid getting closer than 3-inches to the edge of the concrete. If you do, you risk splitting off a chunk of the slab. Of the two, wedge anchors provide the most strength—and are my personal favorite of all the anchors to use.
How to Install Wedge and Sleeve Concrete Anchors – Drilling
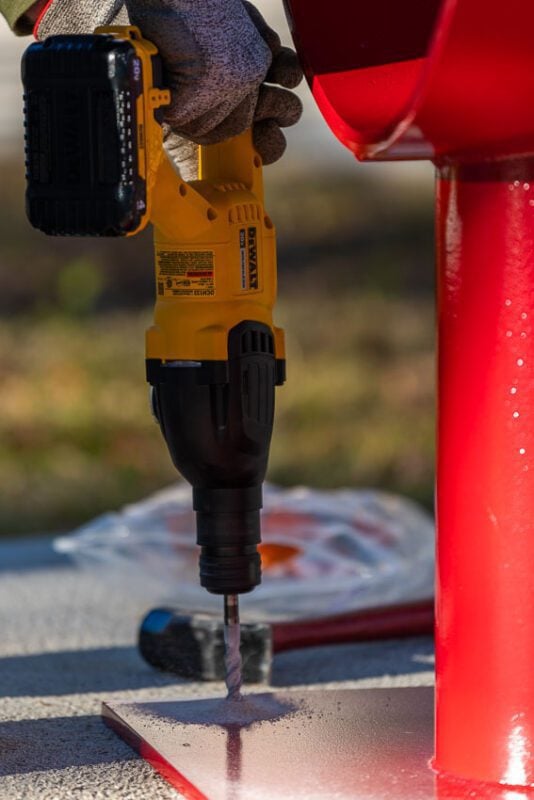
You install both wedge and sleeve anchors the same way. Drill the proper size hole with a hammer drill or rotary hammer drill and insert the anchor. Drive it in with a hammer. More on that below. The hole diameter is listed on the packaging and usually on the anchor itself. You will have to drill the hole at least a 1/4-inch deeper than the anchor.
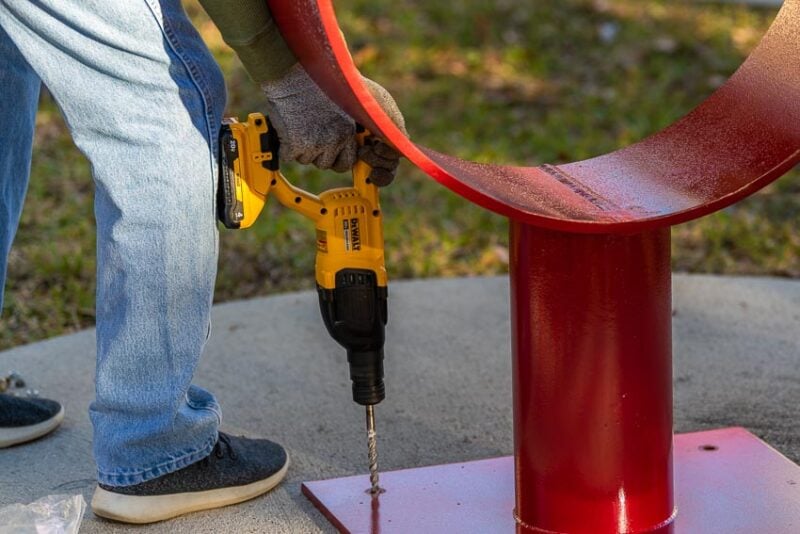
I recently wrote an article on how to drill through concrete. Also, if you are not familiar with the differences between a rotary hammer vs a hammer drill you might want to read that article as well. Both of these are necessary tools for concrete work.
Driving in the Anchor
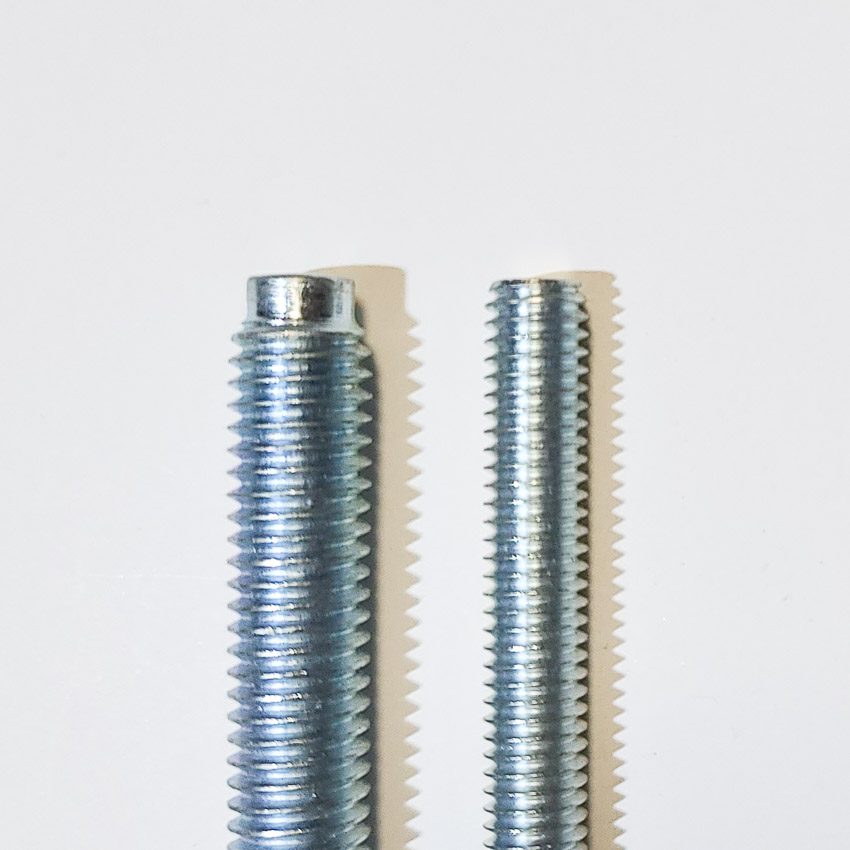
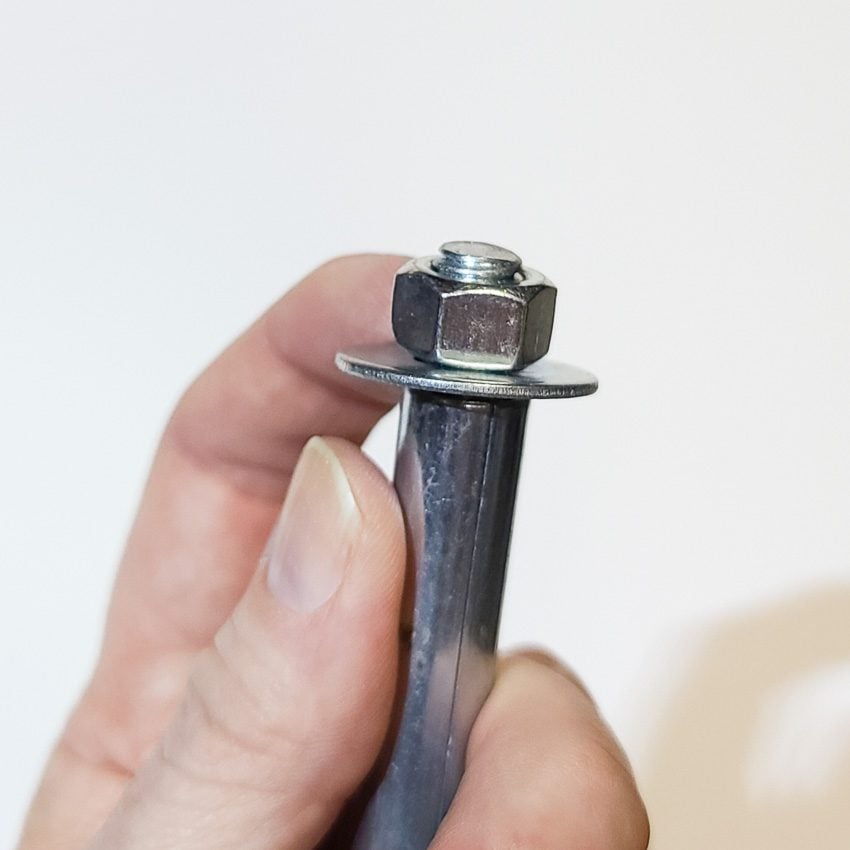
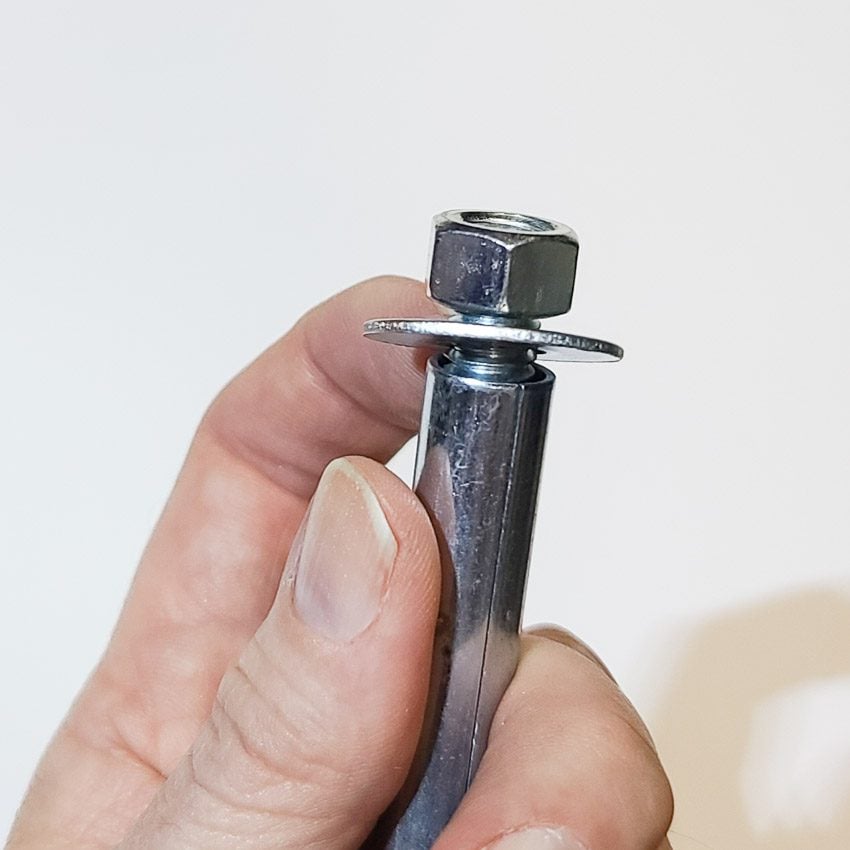
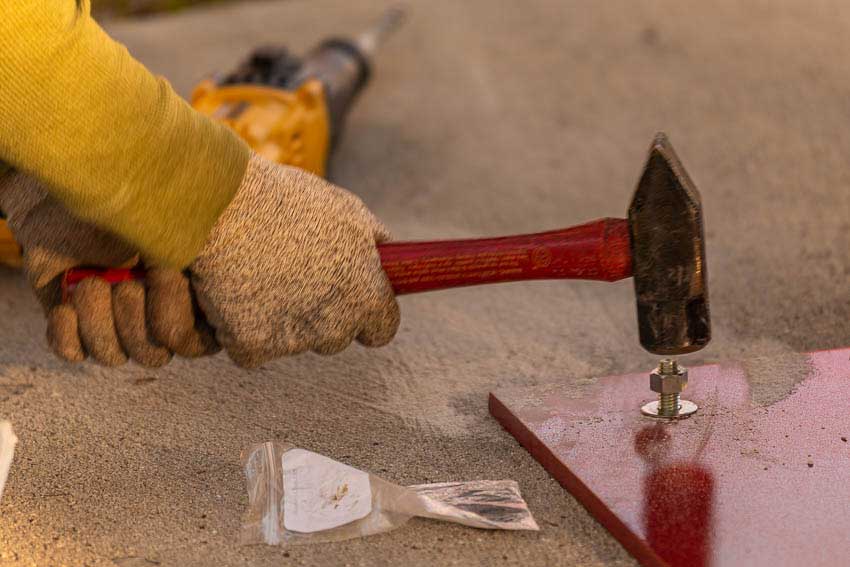
Once the hole is drilled and the anchor is inserted as far as it will go, drive the anchor in the rest of the way with a hammer or small sledgehammer, depending on the size anchor you are using. Be very careful here. Notice the photos below. There are two types of concrete wedge and sleeve anchors. High-quality premium brands have extra metal at the top of the bolt so you don’t deform the screw threads when hammering it in. If you use the cheap anchors, back off the nut so you will not be hammering on the end of the bolt. You want to be hammering on the nut instead and it will protect the threads (see the photo on the far right). Don’t use excessive force regardless.
You cannot remove wedge or sleeve anchors. Instead, you need to cut them off using a grinder or reciprocating saw. For the City of Lakeland’s Florida Outdoor Sculpture Competition, we replace the sculptures every year with new ones. Each sculpture bolts down to a concrete pad using wedge anchors. Rather than cut them off, we actually drill all the way through the 6-inch thick concrete pads to install the new sculptures.
Set the Concrete Anchor and Tighten the Nuts
The next year, after removing the outgoing sculpture, we simply hit the protruding anchor with a hammer driving it flush with the surface of the concrete. The pad is instantly ready for us to install the new sculpture. Drilling all the way through the pad lets water drain through. Otherwise, water in the holes can freeze and expand, causing the pads to crack.
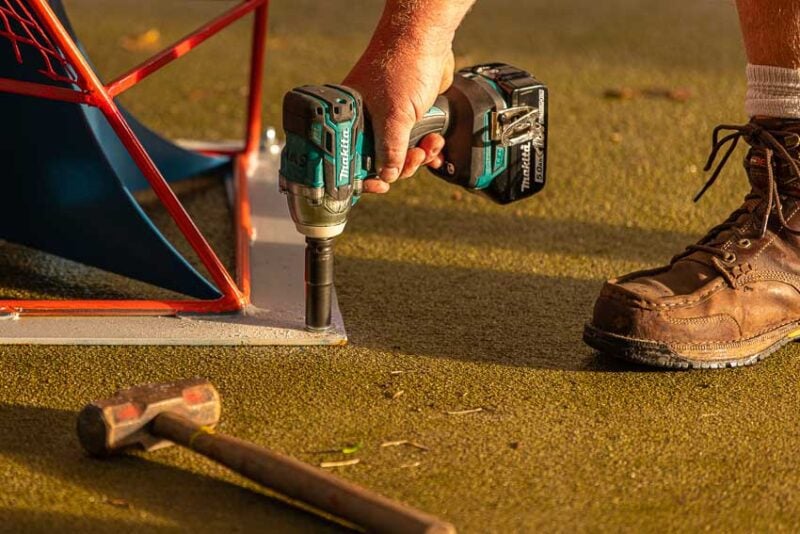
Once done installing the concrete anchors, tighten the nuts. While you can use a socket set or ratcheting open-end wrench to get in tight spaces. To save more time, especially when installing anchors with larger 3/4-inch or 1 1/8-inch bolt heads, invest in a cordless impact wrench. This really speeds up the process of tightening concrete anchors. If you don’t know the difference between an impact driver vs an impact wrench, check out a video we made on the subject.
Large Diameter Concrete Anchors
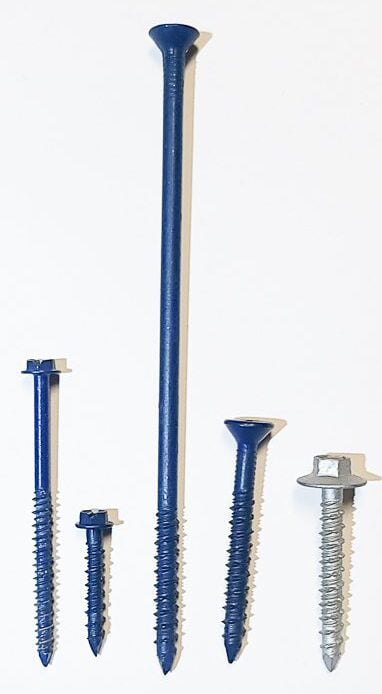
Large diameter concrete anchors, including Tapcon brand Heavy-Duty Anchors, have several big advantages over other types of concrete anchors. In particular, they can be removed, though not reused. Once removed though, you will not be able to reuse the hole. I have reused Tapcon concrete screws in noncritical, indoor workloads provided it goes in a freshly-drilled hole.
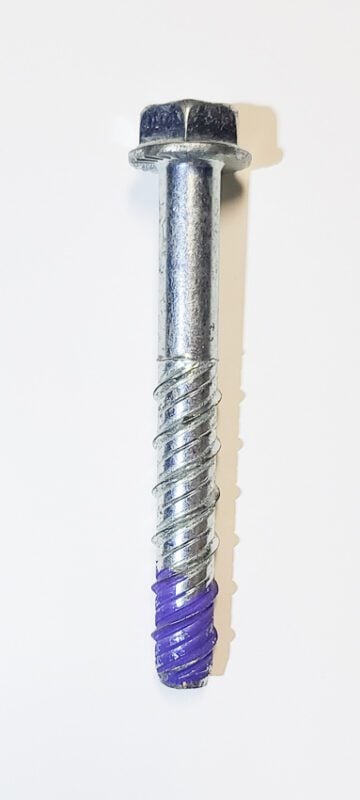
Another advantage of large-diameter concrete anchors is they can get closer to the edge of the concrete than a wedge anchor since they don’t expand.
Tapcon claims their large diameter concrete anchors are 20% stronger than wedge or sleeve anchors. They certainly install very quickly. You will not be able to install them with hand tools (perhaps the Incredible Hulk could). Use an impact wrench to install these large concrete anchors after drilling the appropriate size hole.
Lag Shields (Lead Shields) and Plastic Anchors
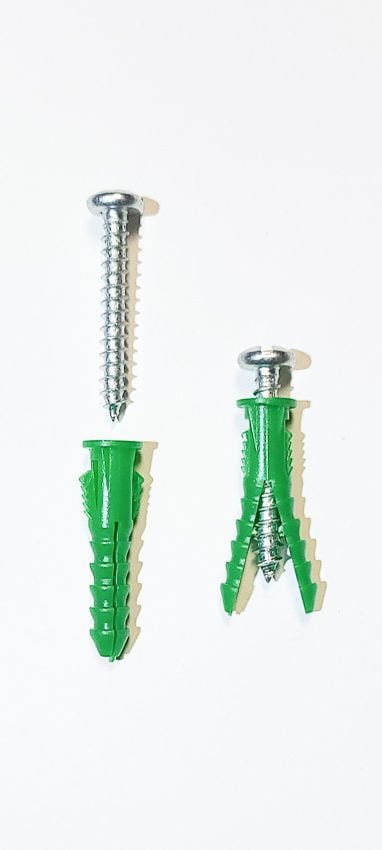
Lag shields (often called lead shields) and plastic anchors both work in the same manner. You drill the correct size hole, insert the anchor, and then drive in the screw. This expands the metal or plastic, wedging it in place. Use these for your lightest-duty anchoring. This goes double for plastic anchors—which we don’t recommend for concrete where you need higher pull-out strength. Plastic concrete anchors work for lightweight objects—perhaps 30 to 50 lbs depending on the size of the anchors.
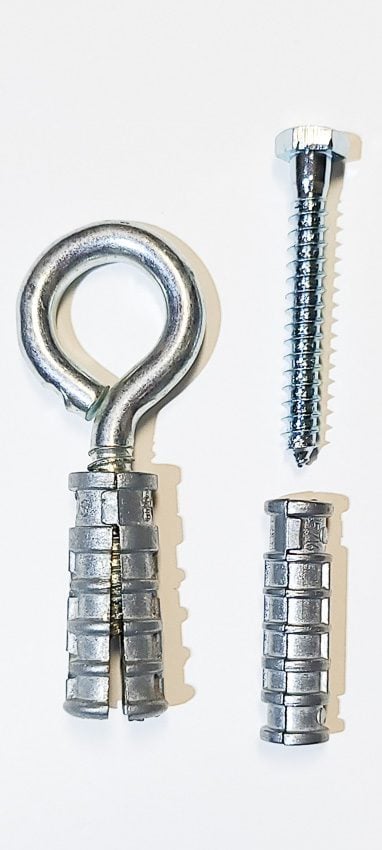
Lead shields, while useful, have diminished in popularity due to the convenience of wedge and sleeve anchors. The latter provide a much stronger hold and most find them quicker to install and use. Lead shields do have one unique trick, however. You are supposed to use lag bolts with lead shields. You can, however, also use screw eyes (screw eyebolts) which have the same threads as lags. Lead shields are the only type of concrete anchor that allows this. Use a construction screwdriver to turn the screw eyes when it gets really tight.
At the Polk Museum of Art, we have lead shields permanently placed in our brick sculpture courtyard. In the event of a hurricane heading our way, we can install large eye screws in the ground, then lash down the sculptures to ready them for the storm.
Tapcon Concrete Screws
It is no exaggeration to say that Tapcons have changed the world. The first art gallery I worked in had brick walls and it was my job to hang the exhibits every month or two. It was such a huge pain drilling holes and installing plastic anchors. I would have killed for Tapcons back then, especially with an installation kit like the ones pictured below. Plastic anchors certainly didn’t do anything for the look of the walls after we removed the exhibit and all you saw were little colored circles on the wall.
Powder Actuated Fasteners
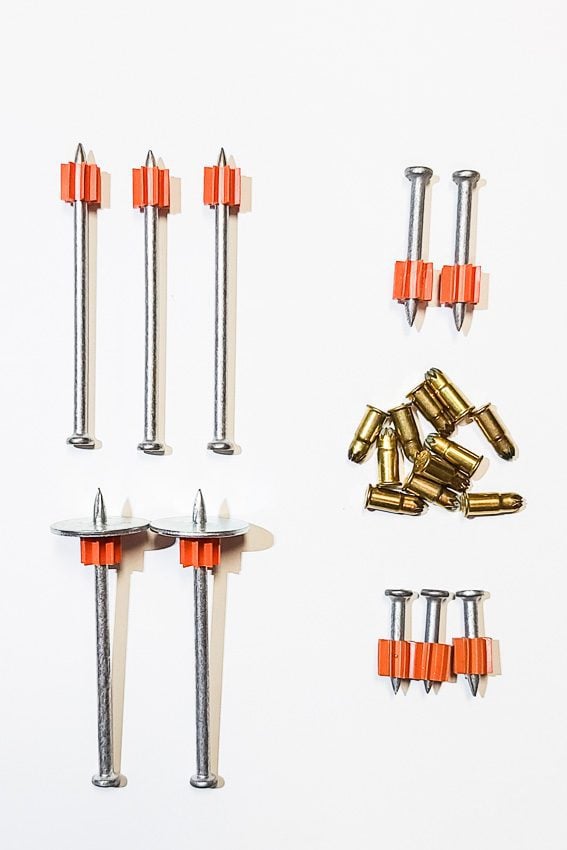
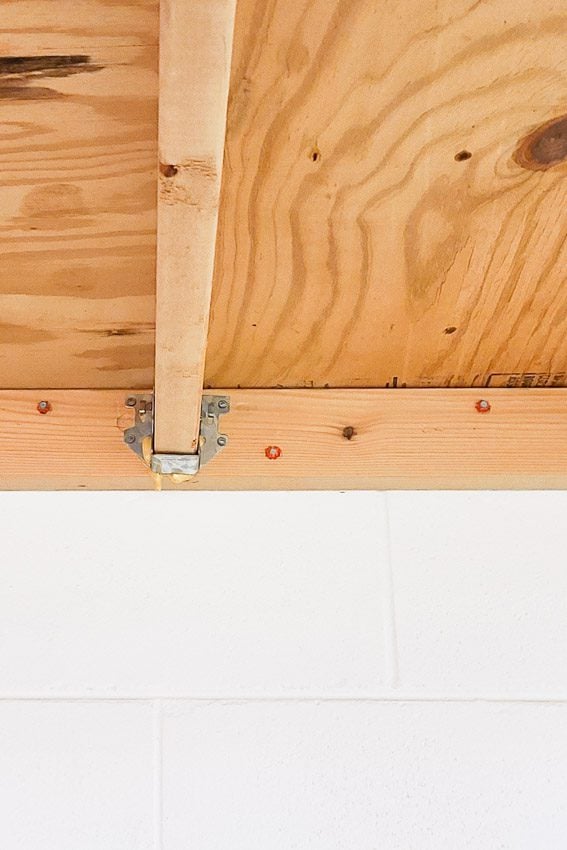
Powder actuated fasteners are sometimes called Ramsets, which is a name brand. They are unique among anchors in that they do not require drilling a hole first. Instead, they use a .22 caliber low-velocity gunpowder charge to drive specially hardened nails through wood or metal into concrete. While fast, they can rupture the concrete around the nail, shifting the board you were trying to attach to it. My personal preference is to use them in cinder block walls and use wedge anchors in concrete.
Toggle Bolts – The Often Overlooked Type of Concrete Anchor
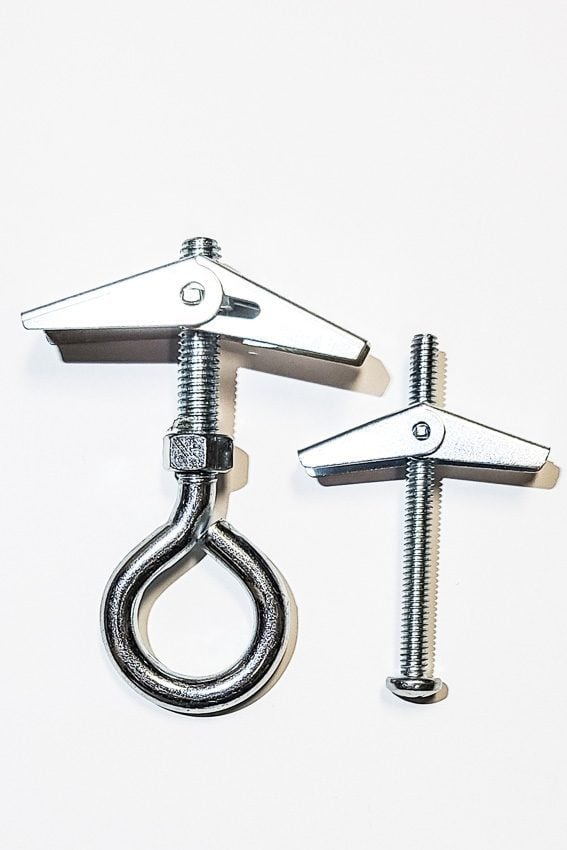
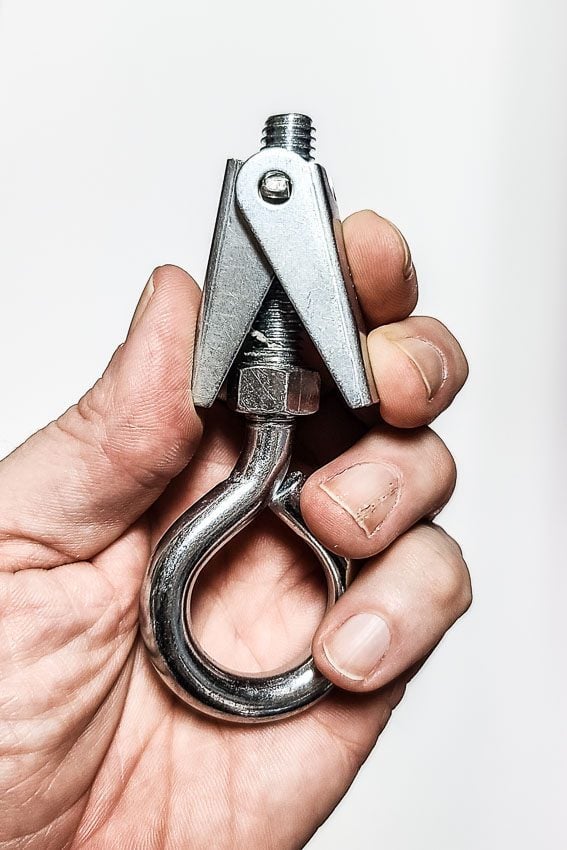
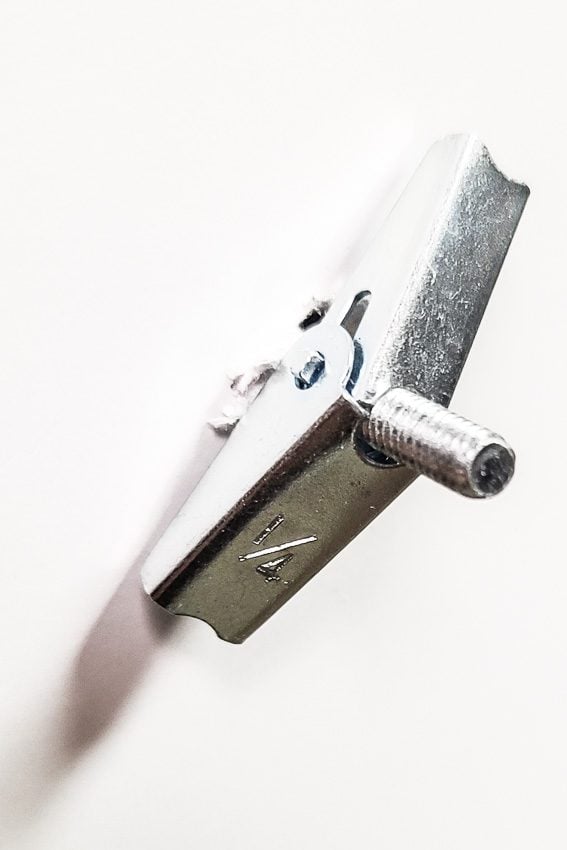
Speaking of cinder blocks, one of the most used anchors for cinder blocks is toggle bolts. They take advantage of the hollow cavity in the cinder blocks. Squeeze the anchor’s wings together folding them up into the smallest possible dimension. Drill a hole just big enough for the wings to pass through. Next, pass the wings through the hole into the hollow cavity where they will spring open. Pull back on the bolt so the wings grab and then tighten the bolt. Toggle bolts are very strong anchors. In the photo below, I replaced the bolt that comes with it with an eye bolt so I could tie a rope to the anchor.
Installation Tools for Various Types of Concrete Anchors
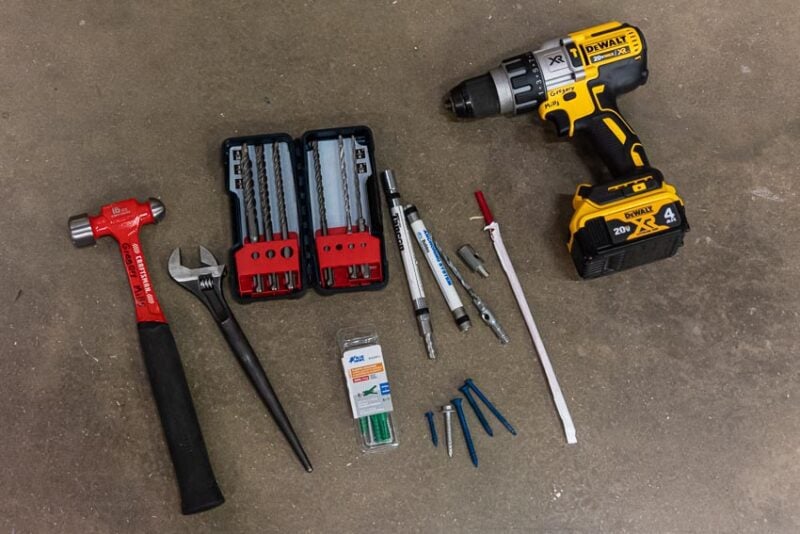
Basic Concrete Anchor Kit – Ideal for Tapcons up to 5/16-inch Anchors
- Cordless hammer drill
- Masonry bits
- Tapcon bit or Tapcon installation kit
- Small bulb or another method to blow or vacuum out the hole
- Hammer
- Adjustable wrench
- PPE (hearing protection, eye protection, and a dust mask)
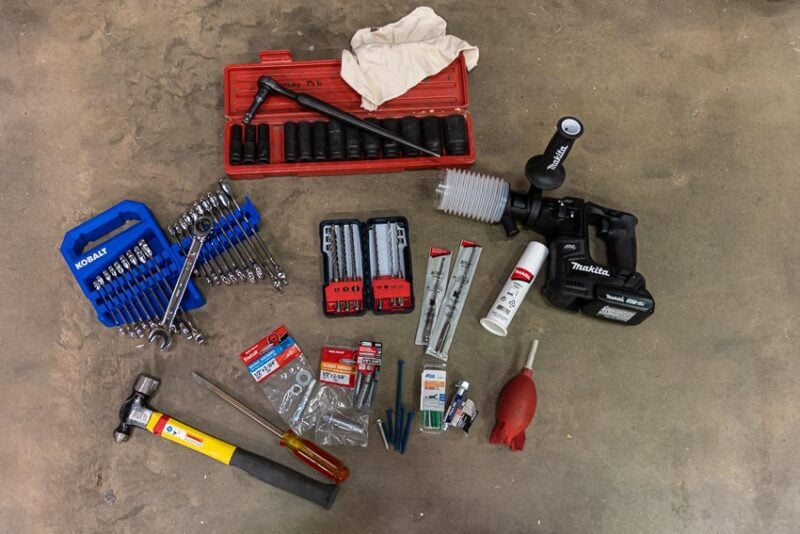
Mid-level Concrete Anchor Kit – Ideal for Tapcons up to 1/2-inch Anchors
- Cordless rotary hammer
- Masonry bits
- SDS Plus Tapcon bits and installation kit
- Dust blower
- Hammer
- Construction screwdriver
- Socket set or ratcheting combination wrenches
- PPE (hearing protection, eye protection, and a dust mask)
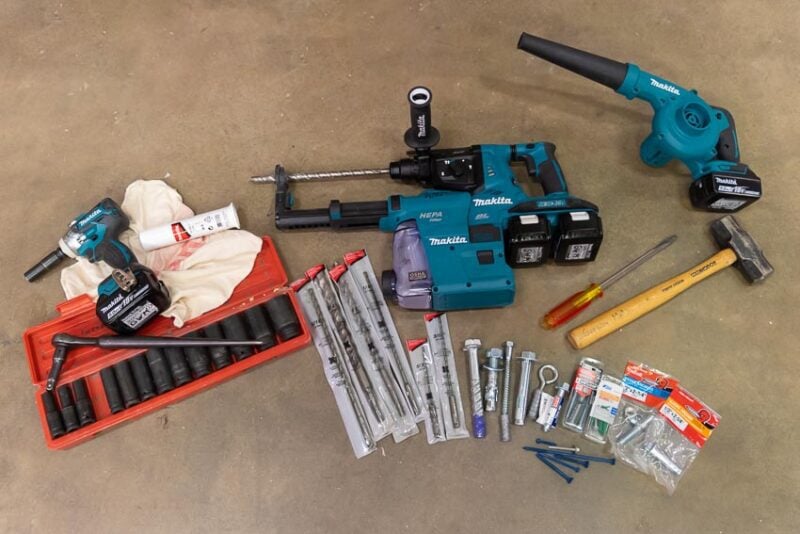
Pro Concrete Anchor Installation Kit – Ideal for Tapcons up to 3/4-inch Anchors
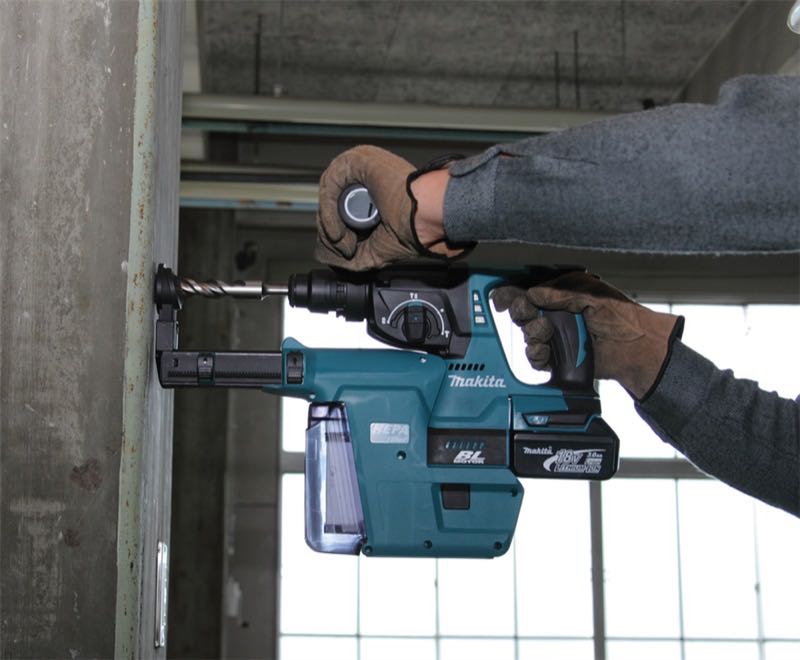
- Rotary hammer drill with built-in HEPA dust extraction
- SDS Plus bits
- SDS Plus Tapcon bits and installation kit (not shown)
- HEPA dust extractor (not pictured)
- 3 or 4 lbs engineering hammer
- Construction screwdriver
- Impact wrench with impact sockets and construction socket handle
- Leaf blower to clean the surface after installation if needed
- PPE (hearing protection, eye protection, and a dust mask)
PPE – Personal Protective Equipment
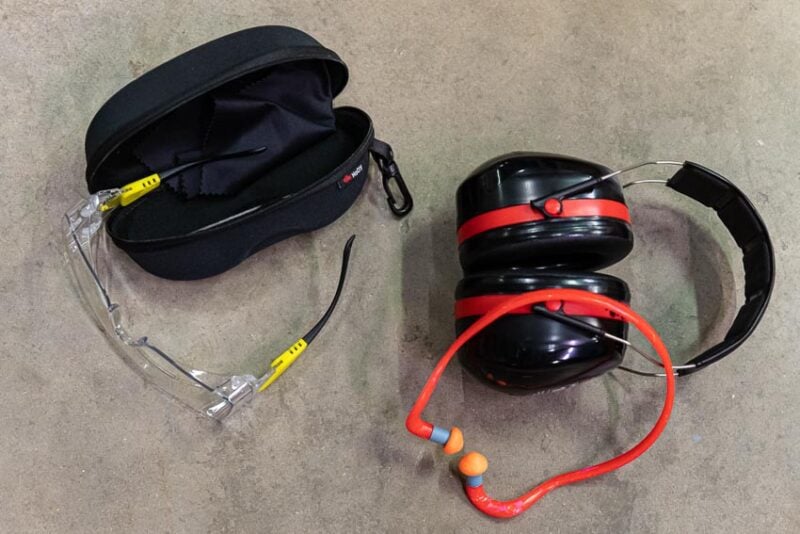
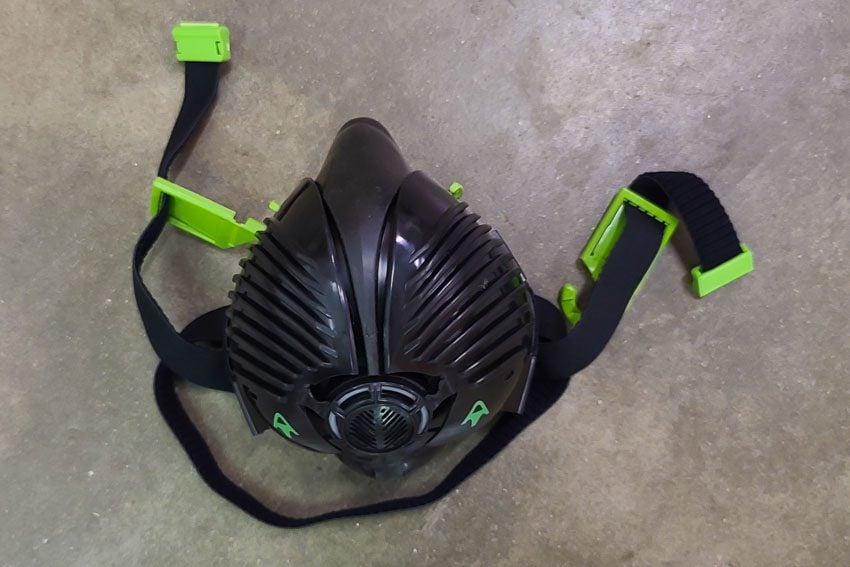
Eyes and ears. That used to be every foreman’s mantra when he saw the OSHA inspector coming. “Eyes and ears, boys!” meant everyone needed to put on their eye and hearing protection. Now, it’s eyes, ears, and lung protection. This is especially true when working with concrete which contains silica, a known carcinogenic. To put it in plain English: concrete dust can cause cancer.
We have several articles on the topic:
Summarizing the Types of Concrete Anchors and How to Use Them
I have shown you many types of concrete anchors. There are actually many more than this, including hammer drive anchors, adhesive anchors, and epoxy anchors. You’ll find the ones in this article on most residential jobsites. Larger commercial or industrial sites might introduce the others. I have used every one of these for various reasons over the years, and each has its place. With the proper tools, all types of concrete anchors are fairly easy to install. Have fun drilling! I know I will.



I enjoyed this article on anchors. It is everything I would ever need to know about installing and using anchors. I saved on my computer for future reference.
We often use epoxy anchors and other adhesive anchors on residential and commercial construction. It seems worthwhile to inform subscribers of the different types of epoxy anchors and the different ways to install them. The pros and cons of using other adhesive anchors is also a worthwhile subject.
How well would a large diameter tapcon work as a machine anchor if it is subjected to vibration? We always feel better with an epoxy anchor in that situation.