

We show you several ways of how to change an angle grinder wheel. You can do this in any number of ways—even if you’ve lost your spanner wrench. Don’t worry, all hope is not lost!
Note: Want to see a video of how to change an angle grinder wheel using these same methods? Check out our YouTube tutorial!
How to Change an Angle Grinder Wheel with a Spanner Wrench
What you need:
- Your angle grinder
- The spanner wrench that came with your angle grinder (different models use different sizes, so another may or may not work)
- A grinder wheel you want to install
Here’s how to change a grinder wheel with a spanner wrench:
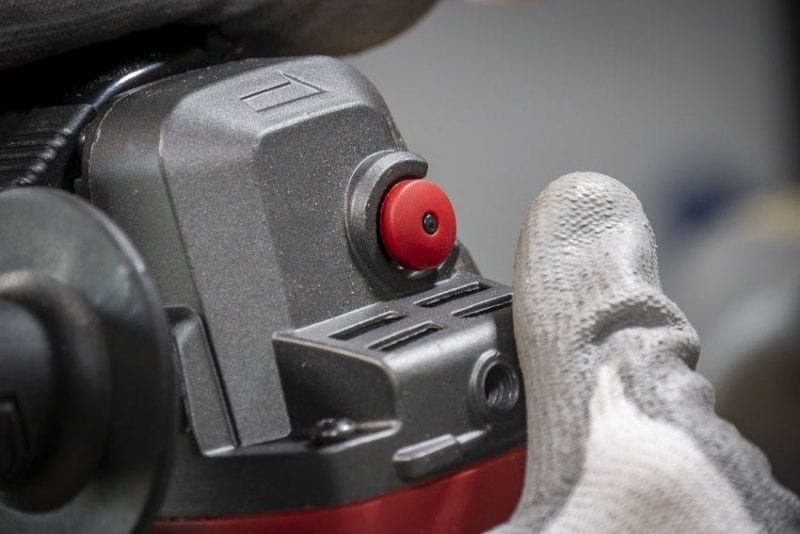
- Locate the wheel lock button (usually on the top). Press it down and rotate the wheel until you feel it lock into position.
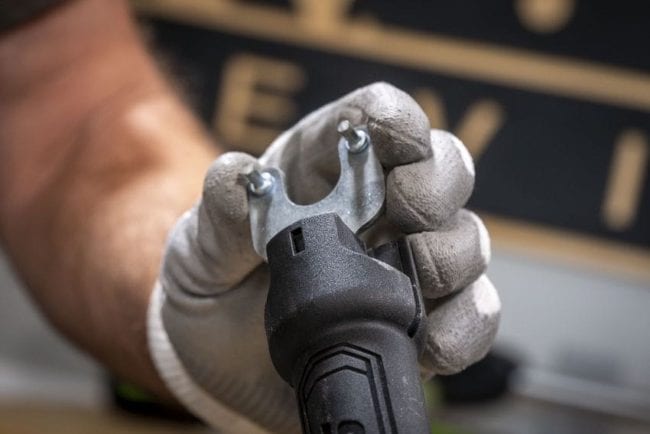
- With the button held down, place the two knobs of your spanner wrench into two opposite holes on the flange holding the wheel in place (the flange is the round nut-looking piece that holds the wheel in place.
- While pressing down the wheel lock button, turn the spanner wrench counter-clockwise until you feel the flange loosen.
- Hand thread the flange off.
- Slip your new angle grinder wheel on, and reverse the process.
How to Replace an Angle Grinder Wheel Without a Spanner Wrench
Sometimes you misplace your spanner wrench – it happens a lot unless the wrench stores on the tool the way Skil’s PWRCore 20 angle grinder does.
What you need:
- Your angle grinder
- A pair of gloves
- A grinder wheel you want to install
Here’s how to change an angle grinder wheel without a spanner wrench:
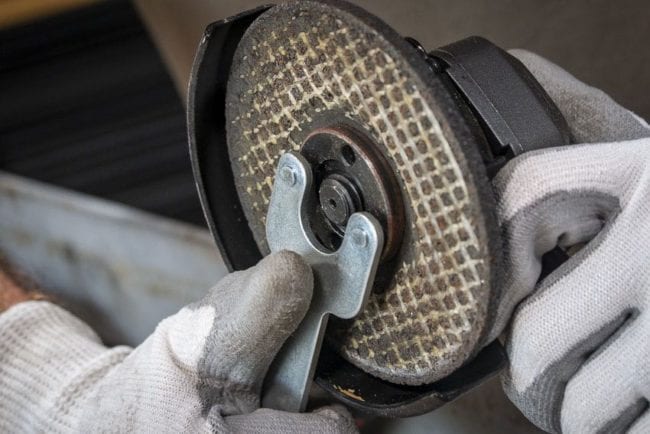
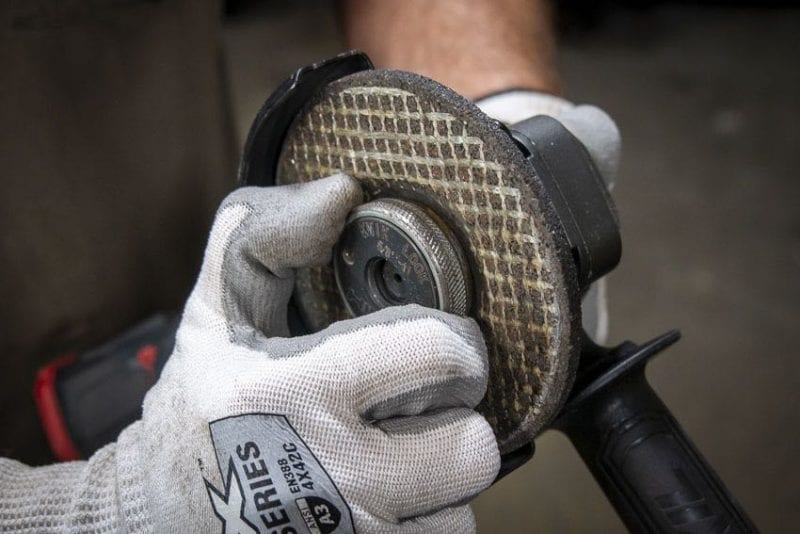
- Hold down the wheel lock button and turn the wheel until it locks in place.
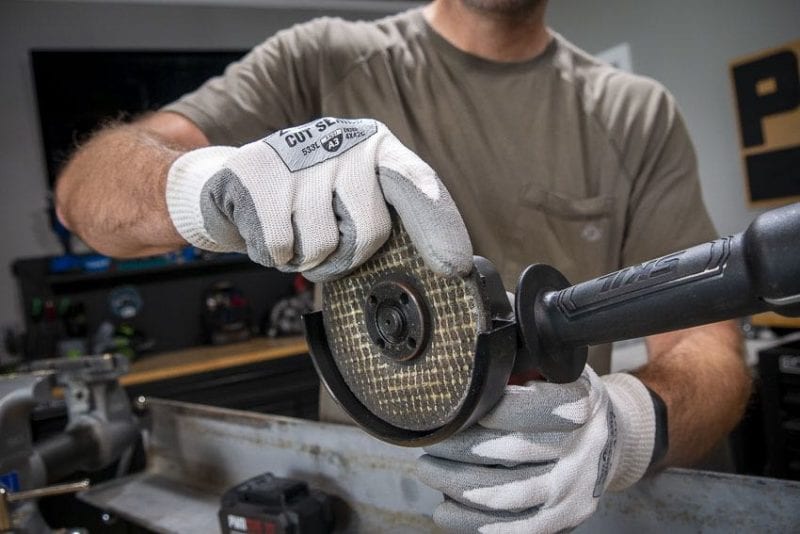
- With gloves on, grab the wheel and turn it counterclockwise until you feel the flange release.
- Hand thread the flange off.
- Swap the wheel and reverse the process.
This method works, but there are a couple of considerations. First, I’m not as confident in tightening the wheel by hand, so I always use a spanner wrench to make sure it’s tight enough.
Second, thin abrasive cutting wheels are more prone to breaking or weakening with this method, so we don’t recommend you try it with those. You could inadvertently create a situation where your cutting wheel fails with dangerous consequences.
Many Pros do another take on this by running the wheel against concrete to loosen it rather than by hand. Either way works and carries the same warnings. I personally find loosening by hand easier.
The Easiest Way to Replace a Grinder Wheel
My favorite way to replace an angle grinder wheel involves switching out the stock flange with a Hilti Kwik-Lock flange. We originally used on Hilti’s 36V grinder and find it an excellent upgrade for any model that has the same 5/8-inch arbor.
The genius of it is a design that allows you to hand thread and tighten/loosen with just your bare hand. It’s perfectly secure and super-simple.
In the event your grinder wheel helps tighten it down too much, two holes let you get a spanner wrench in to work it back off.
Here’s what you need:
- Your angle grinder
- A Hilti Kwik Lock flange
- A grinder wheel you want to install
Here’s the easiest way to change an angle grinder wheel:
- Hold the wheel lock button down and turn the wheel until it locks.
- Turn the Kwik Lock flange counterclockwise by hand until it loosens. You’ll feel some spring tension movement first before it breaks free.
- Hand thread the flange off.
- Swap the wheel and reverse the process.
The downside is that these flanges cost a little more than $50 each. That might be too steep for a DIYer. Having a couple of these on hand for Pros that use grinders often can make life easier, though.


Just buy an X-Lock grinder (invented by Bosch and also implemented by Makita and others).
Release: pull the lever and you’re done. Time: 0,5s
Attach: push the disc until the mechanism clicks. Time: 1 s.
No checking the tightness. If you hear the mechanism click, it’s 100% secure. No unwanted and dangerous loosening either. Like SDS for drills and jigsaws, this makes the old method of fastening discs completely outdated and obsolete.
or get milwaukee’s fastfix or a xlock grnder