
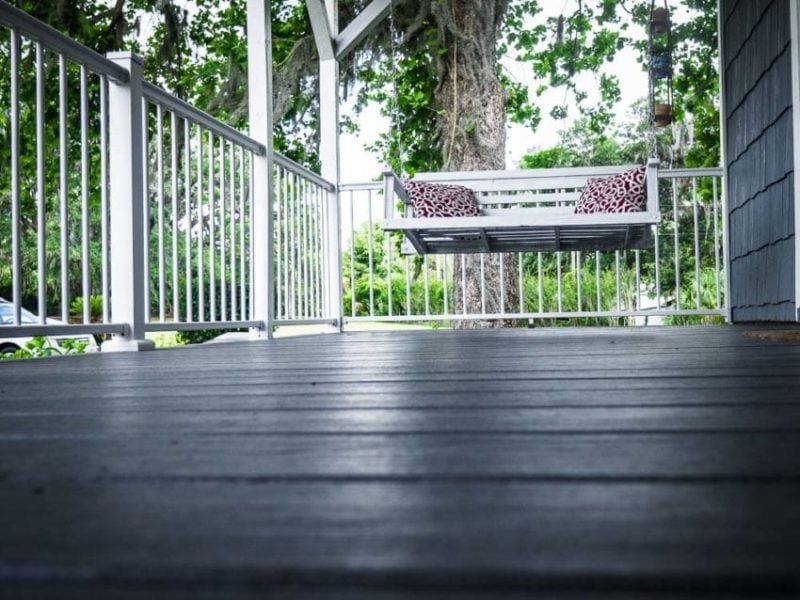
First, you walk out the front door and notice the paint on your wood decking is starting to fade. Before you know it, days turn into years, and now you’re stepping over rotten wood and voids where faded paint used to be. After you lose a few toys a couple of small pets, and maybe your youngest child, you know it’s time to do something. In my case, that “something” involved installing MoistureShield Composite Decking and their Pro Aluminum Railing.
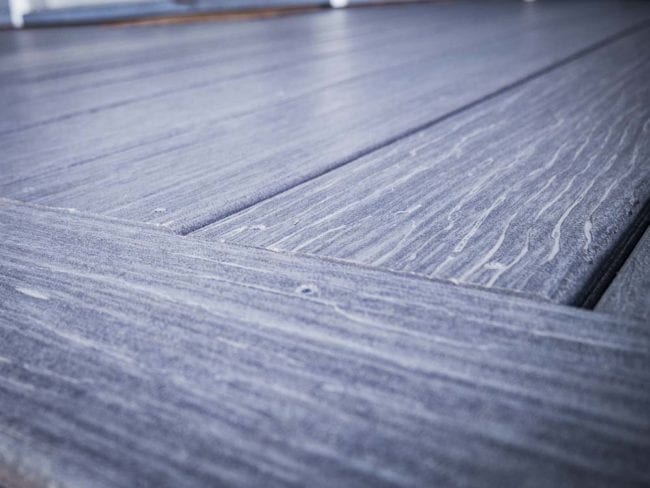
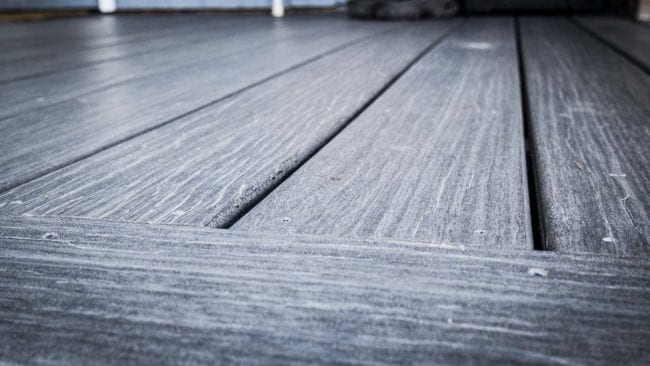
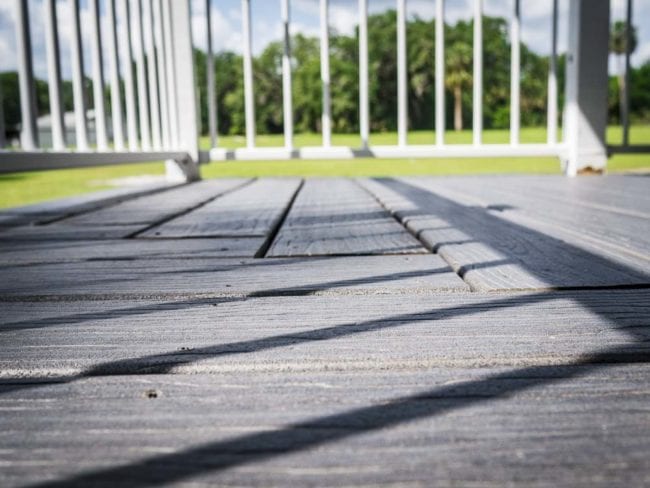
MoistureShield composite decking brings the hardwood look of your home’s interior to your outdoor living space. It has a limited lifetime warranty and is one of the only composite decking materials that can be installed in water without any issues. MoistureShield offers several lines and colors for their composite decking. We chose the Vision line in the “Smokey Gray” color. The MoistureShield Pro Aluminum railing is available in white or black, so we decided white would be the best choice to match the Smokey Gray composite deck.
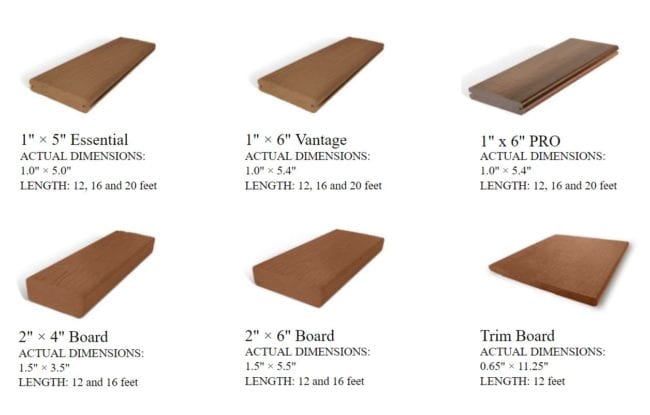
Similar to lumber sizes, the most common MoistureShield composite decking comes in the lumber dimensions of a 1 x 6. The actual dimensions are ~1” x ~5-1/2”. Other dimensional sizes are available as well, which we’ll get into later.
Preparing for MoistureShield Composite Decking
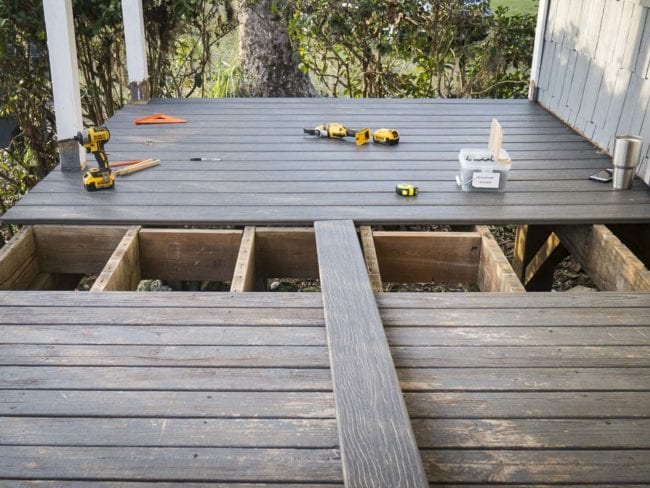
MoistureShield composite decking installs on the same ‘bones’ as typical wood decking. However, before you start the install, all the old wood decking needs to come up. Once all the tired wood was gone, inspect the framing to ensure that we have good wood to fasten to. Sometimes you’re in good shape, other times you’ll need to replace some boards. On our project, only a few boards needed repair.
Options and Choices
Even after you choose the line and color that you want to go with, there are still other options needed to be considered. There are grooved and non-grooved composite decking boards. Do you want exposed fasteners (non-grooved) or hidden fasteners (grooved)? Hidden fasteners are going to cost more money, but they offer a cleaner, more professional look.
Feeling Not So Groovy
If you choose to go with the hidden fastener (grooved) look, you’ll want to include some non-grooved boards in your order as well. The grooved boards include just that on the long edges – grooves. When your grooved boards terminate on the edge, you either see the long grooves exposed down the edge of the board, or you see the cross-cut ends of the boards with the small groove on either side. While this may not be a show-stopper, it can be unsightly. The better idea is to do some picture-framing or soldiering on the outer edge of your decking project.
After your groovy decision is made, you still have more options to consider. The MoistureShield composite decking comes in 12, 16, and 20-foot lengths. They also offer 2×4 (1-1/2” x 3-1/2”) and 2×6 (1-1/2” x 5-1/2”) composite boards in matching colors. These are available in 12 and 16-foot lengths. Finally, Trim Boards measure .65” x 11.25” and only come in 12-foot lengths. Trim boards are what you’ll use for trimming out the edges of your deck, including around stairs, risers, etc.
Expansion Joints
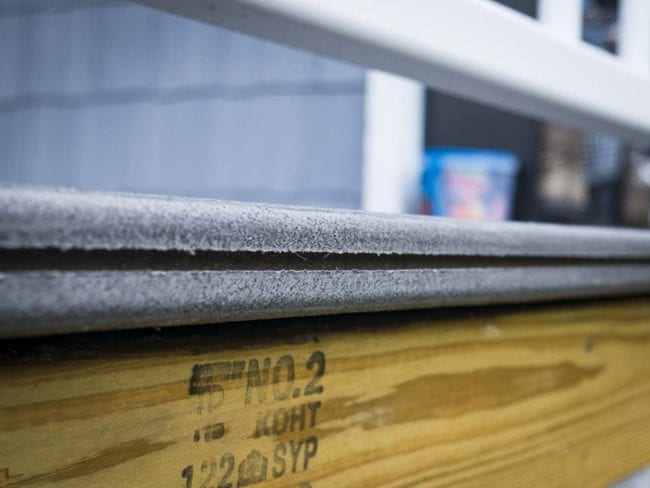
While composite decking expands and contracts less than wood will, MoistureShield still recommends a side and end-gap when you install it. Keep in mind that all the framing underneath is still wood, so it will expand and contract with temperature changes. Allow 1/4-inch side-to-side spacing between deck boards and 1/8-inch (or greater) end-to-end spacing between ends of boards (butt joints). If you’re in part of the country that expects freezing temperatures during the winter, leave 1/4-inch butt joints.
Installing MoistureShield Vision Composite Decking
Much like tiling or other types of flooring, getting started is probably the most important and time-consuming step. The last thing you want is to get started ‘square’ and then end with a crooked overhang on the opposite end of the deck. Measure twice, do a temporary layout, then measure again before making your first cut. Quality planning on the front end is critical to a professional finish.
Cutting the MoistureShield composite decking is simple, and much like cutting lumber. We used the Milwaukee M18 cordless dual-bevel miter saw to handle all our cross-cuts. The cut edges on the MoistureShield composite are very clean, with no signs of chipping or blowout. Since it doesn’t melt like other composites that we’ve seen before, MoistureShield recommends using a Carbide-tipped circular saw blade with fewer than 20 teeth. This would be for a typical 7-1/4” circ saw, so a standard framing blade on your miter saw will work just fine.
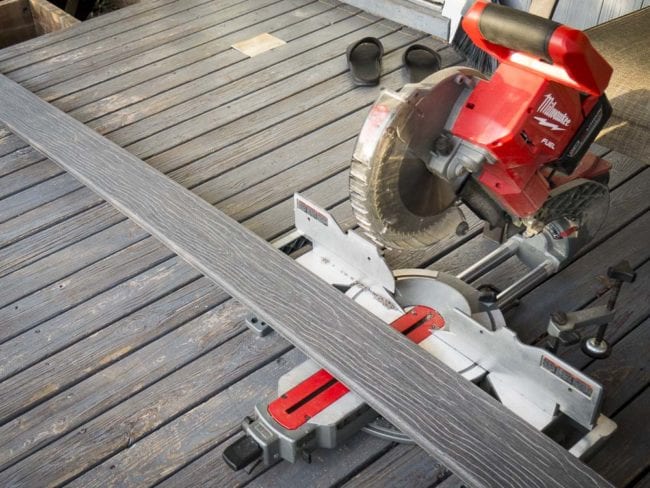
Pro Tip: These composite deck boards are not always straight. In fact, if they’re laying in the sun awaiting installation, they will tend to warp. Make sure you pop a chalk line every now and then to keep your new deck straight and square. If you come across an offending board, traditional board straightening methods work fine.
Turning the Corner
This project is more of a porch than it is a deck. The porch spans the front of the home, then makes a 90-degree turn and runs another 30-feet down the side of the home. At the turn, the old wood decking just butted perpendicular to one another at the turn. A herringbone pattern at the transition with the MoistureShield composite decking adds a much more appealing look.
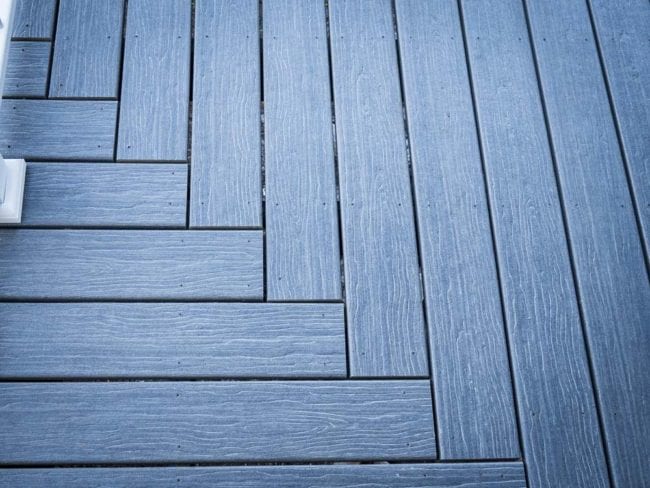
In order to make the herringbone pattern at the transition, you may need to add diagonal bracing to the deck framing. This isn’t too difficult for most projects – you only need to add it where the ends of the MoistureShield composite decking will terminate. Without this additional bracing, the ends may be over a void, which creates a soft spot.
To pull off a herringbone transition, ensure that you turn the corner at exactly 90°. If you’re off, the boards will show it. Use a rafter square (Speed Square) to get your pattern going. The herringbone pattern with the MoistureShield Vision ends up being a great look no matter what color you choose.
Once all the decking is complete, it’s time to trim it out. This goes pretty fast, as all you’re doing is covering the “fascia” boards that border the deck.
Next Up: Installing MoistureShield Pro Aluminum Railing


I have a customer that I installed a Moisture Shield deck for and after only a few months, the decking was covered with black spots. After contacting the rep, they were told to clean it with a product not available in Canada and after 4 attempts to remove the spots they were still there. Then, after a year , the decking had faded so badly that it looked like a totally different colour. Again , they contacted the company only to be told, after several months of waiting for a response, that there isn’t a warranty against fading on their… Read more »
I am a homeowner who chose Moisture Shield decking due to limitations imposed by our homeowner’s association. Ordered materials in early June, but the deck was not completed until September because the MS materials were delivered severely damaged with gouges, mold, and warping. Lowe’s took the damaged materials back, but it took FOREVER to get the replacement materials to us. A representative came out to view the damages, but after many forms and pictures Moisture Shield took no action to address our concerns. Poor customer responsiveness, ignored our emails. Only use Moisture Shield if you can tolerate the time, effort,… Read more »
After less than one year my deck appear to be older than 10 years. COmplete decoloration, white stripe visible. Its just doesn’t look like a new one. I’m very insatisfy and regret having this produtc I don’t recommand that.
Our MoistureShield decking had to be replaced twice in 10 years due to extreme warping, causing liability issues for homeowner. Contractor blames the material. Says installation was correct. Truly, does composite only last 5 years? We thought we were getting the best product. As women, are we being played?